This documentation is for our legacy platform hosted at mtag.io. If you are using the Object Manager and Studio hosted at bluebite.com, see our Updated Documentation.
Dashboard
The three main pillars of Blue Bite’s Platform are object management, analytics and content management. The object management and analytics tools are both housed in the Blue Bite Dashboard.
Log into the Dashboard to manage your account, gain high level insights into user interactions with your objects, and create and edit your digital objects.
Tip: To learn more about our content management services, see Studio.
Accessing Your Account

Access your account page by clicking your Name on the upper left side navigation bar; you can also use this link. Here you may change your personal account settings, reset your password, view your subscription plan and view your invoices.
Introduction to the Dashboard
When you first log in, you're greeted at the Dashboard view with an at-a-glance window into consumer engagement happening across all projects. Total Interactions measures the total visits (raw taps and scans) across objects.
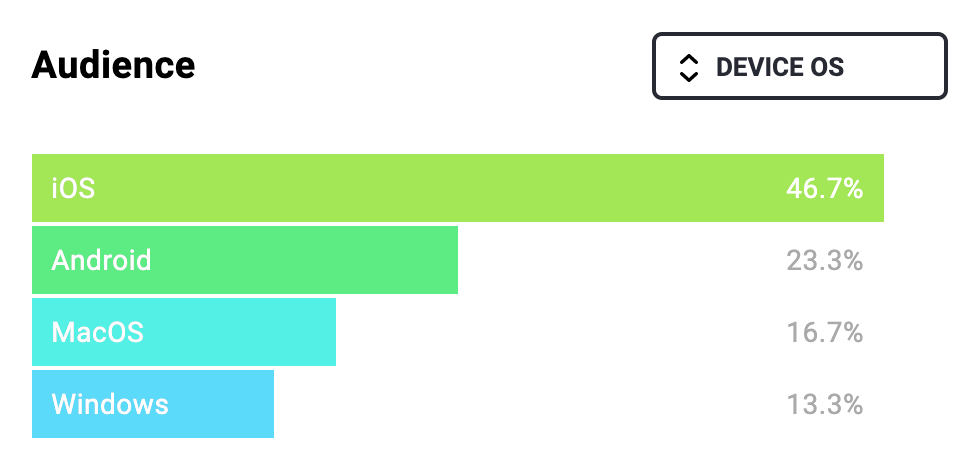
Aggregate charts are included that visualize performance by location, type and audience. Use the drop-down menu located at the top right of each aggregate chart to change its scope.
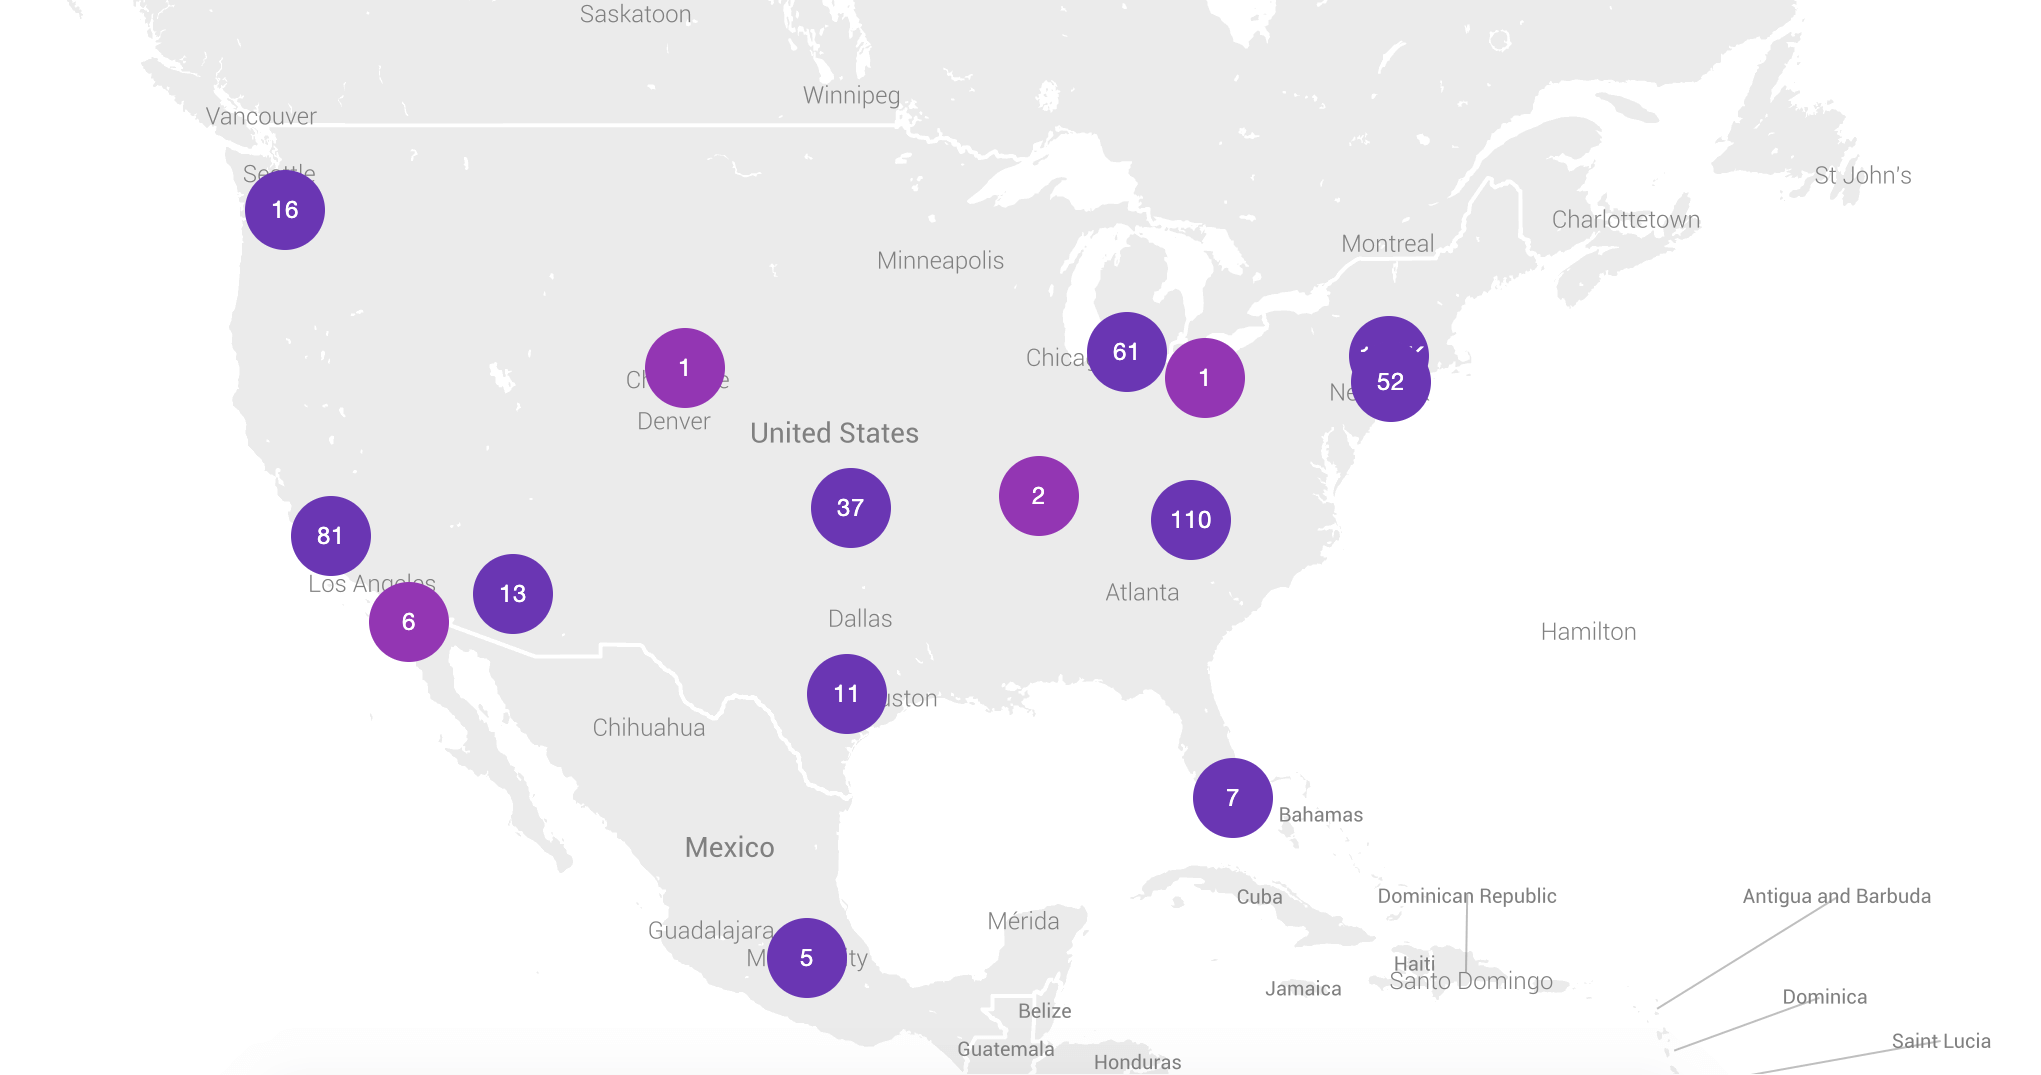
Scroll further down the homepage to view a map of activity. Click on a number and the map drills down to a more specific location.
Finally, total interactions over time histogram visualizes engagement over a date range you can configure viewing this information by the hour to the year.
Object Management
mTAG
Object management tools can be found under the mTAG tab at the top of the screen. Here you can edit the attributes and content of your digital objects. mTAG stands for mobile tag, and each object has an assigned digital ID representing its physical object.

The mTAG table displays all objects and their most commonly edited attributes. Each field is searchable at the top of the screen. Click on a column heading to search that column for a specific value.
- Entering a search term in two column headings will yield an AND operation.
- Entering multiple search terms separated by commas—such as mTAG IDs—in a single column heading will result in an OR operation.
Columns with visual arrows can be sorted both ascending and descending. The checkboxes to the left of each object allow you to select one or more objects to edit.
For more information on a specific object, click the underlined mTAG ID to view all attributes assigned to the object on the mTag Object Detail page.
Individual Object Details
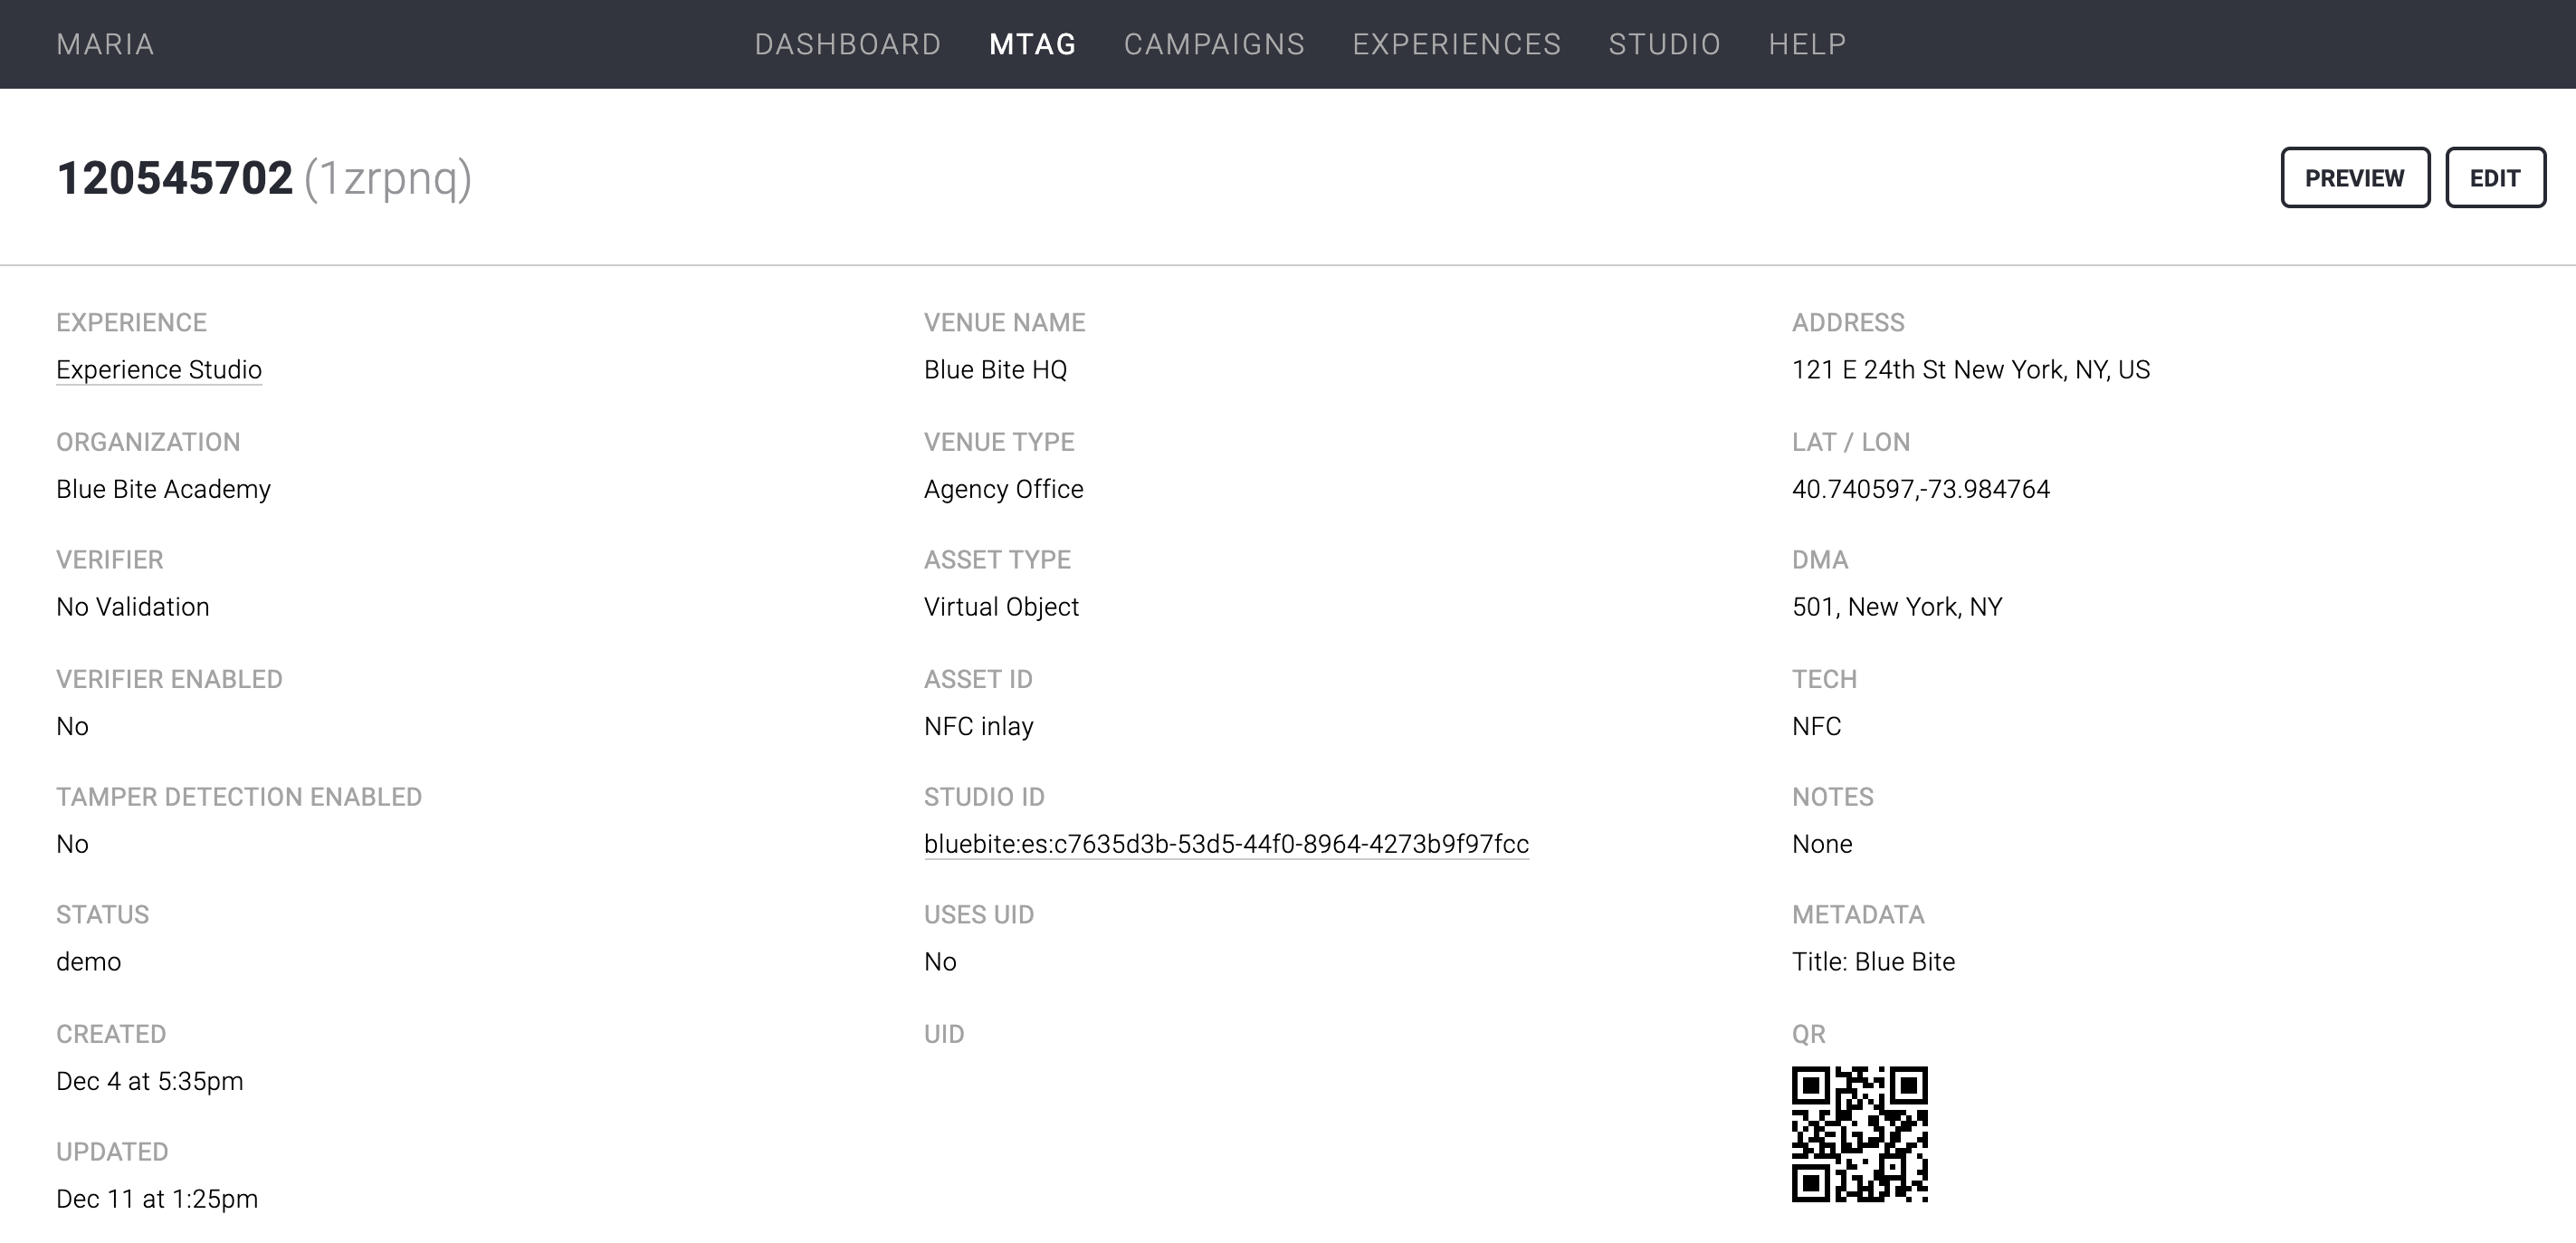
Object attributes and interaction information are displayed on the mTAG Object Detail page. These fields are editable and exist to help you organize your objects.
The mTAG ID is featured at the top of the page in both numerical (8-9 digit) and short code (5-6 character) formats. These IDs are encoded to your individual objects. Searching by either ID format will return that specific mTAG object.
Easily edit an object's attributes by selecting the Edit button at the top right of the screen, or use the Preview buttons to preview an object’s Experience.
Tip: If using the Verified Component, there will be two Preview buttons: Preview and Preview √.Preview will show an Unverified Experience while Preview √ will show a Verified Experience.
Scroll further down the page to view the analytics for that individual object.
Object Editing
Add Content to Objects
- Navigate to the mTAG tab in the Dashboard
- Select desired mTAG object → Click the “Edit” button
- Choose Experience Studio from the dropdown labeled Experience
- Choose the Studio File Name from the dropdown labeled Studio Experience
- Click the “Update” button

Select URL Redirect instead of Experience Studio if you would like to take the user directly to a specified URL, once scanned or tapped, instead of an Experience. Enter the desired URL under the Advanced drop-down.
Tip: If an mTAG object is improperly configured or if there is no Studio file associated with it, it will display a fallback Experience.
Advanced Drop-down
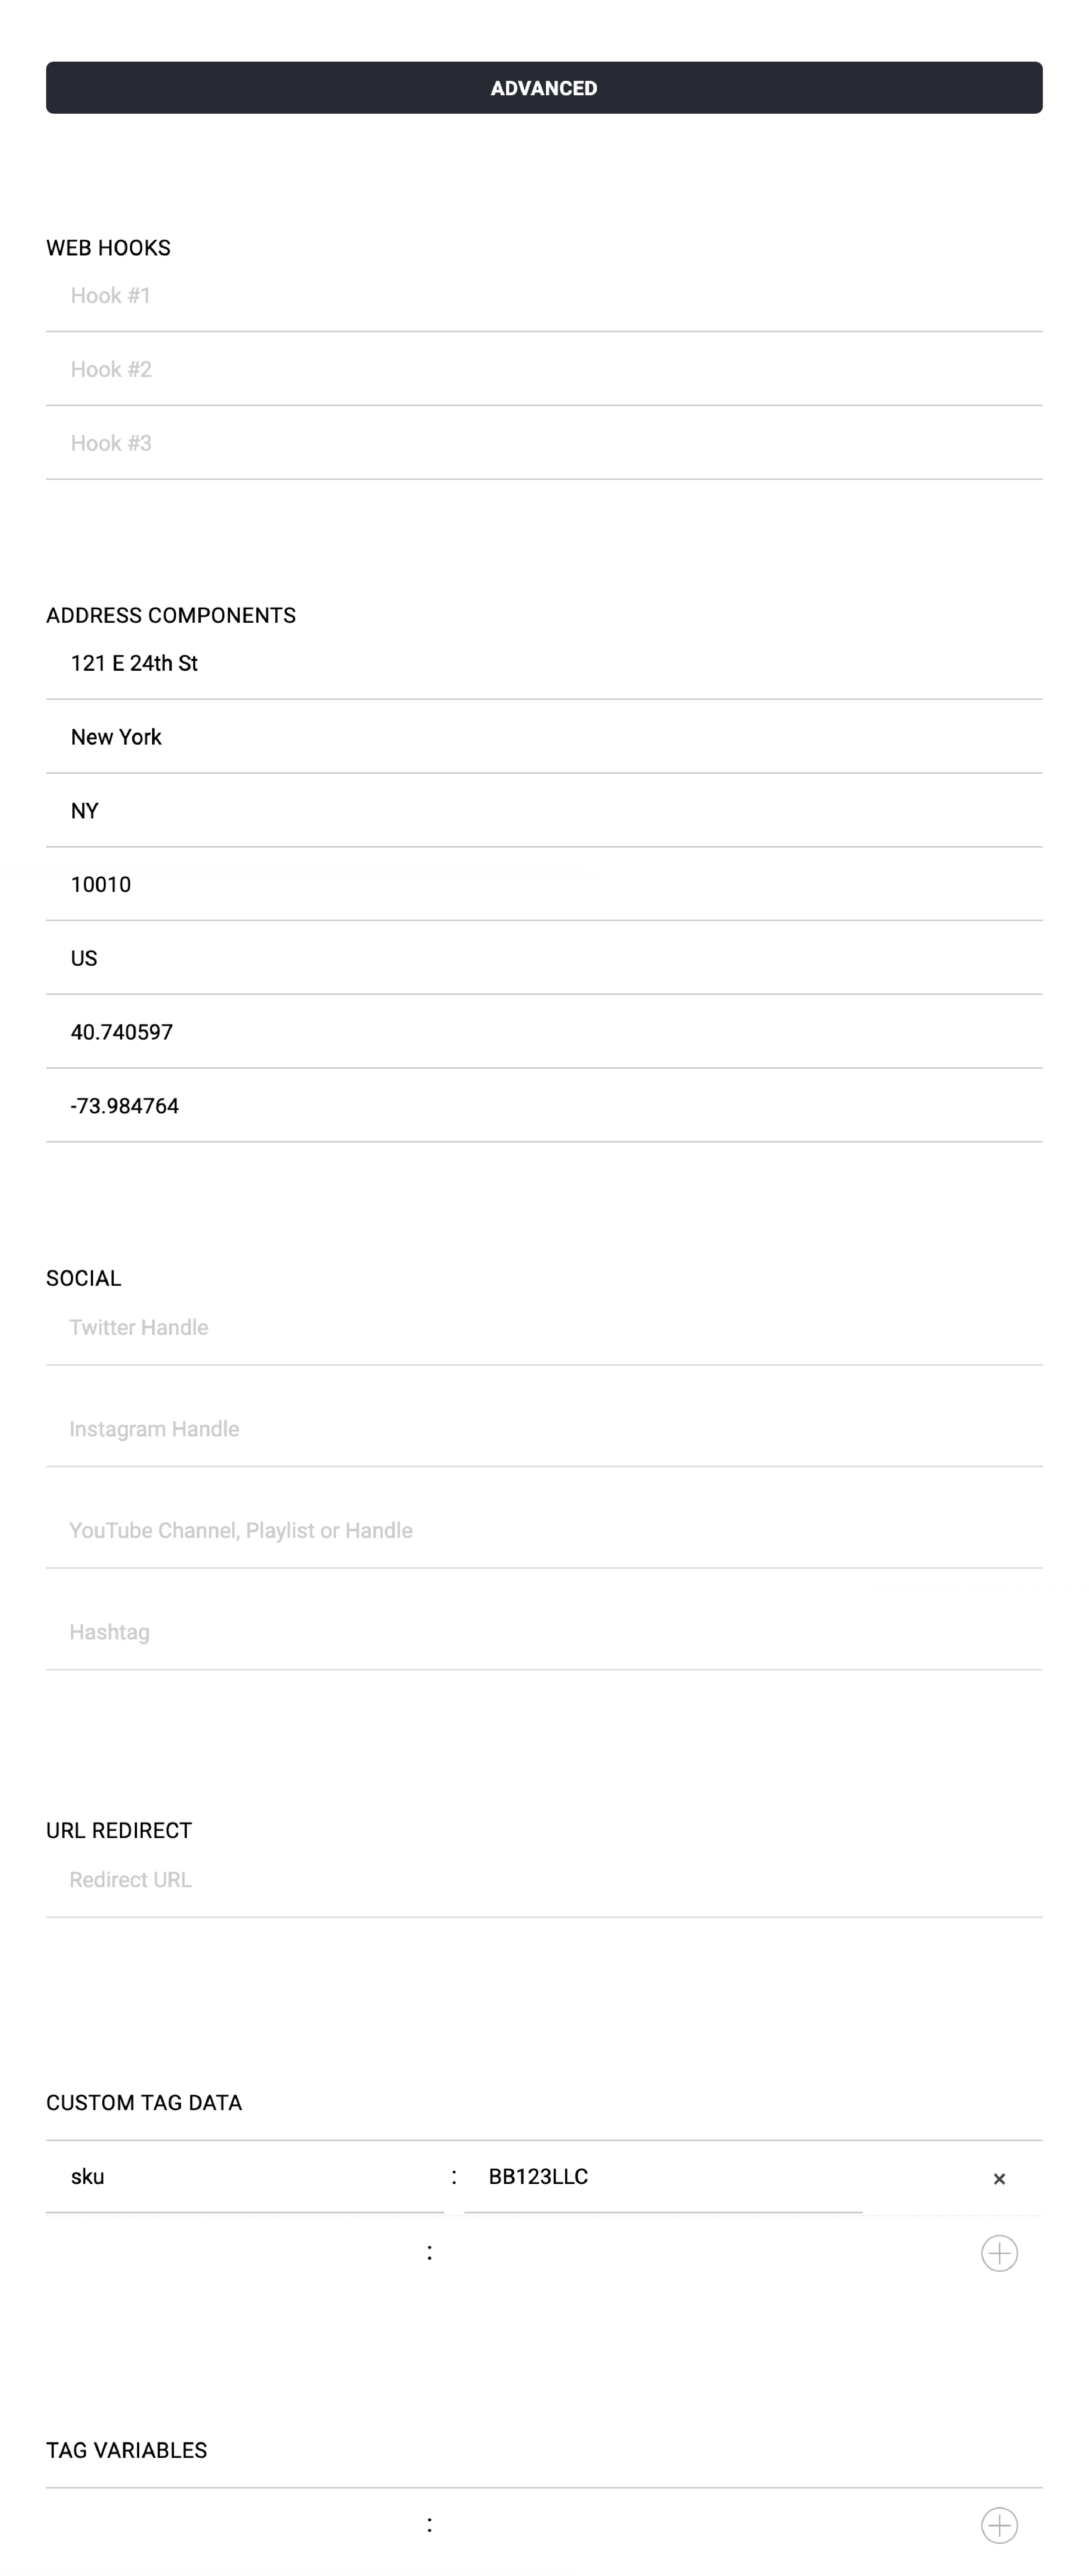
Custom Tag Data
Custom tag data consists of custom properties that allow you to create additional descriptive fields in addition to the object attribute fields set in the platform (Asset ID, Venue Name, and more). With the use of macros, your additional fields can be used to create dynamic Experiences. See Macros Overview for further examples.
Example custom tag data entry:

Note: Don’t forget to press the ⊕ icon.
Tag Variables
Tag variables are object properties, similar to custom tag data. However, the tag variable value can be set to update when consumers interact with the Experience in specific ways. Users cannot change tag data properties such as Location, Asset ID, Venue Name; however, tag variables allows them to add data which will alter how that object displays its Experience. See Custom Attributes for further information.
Specifications for Updating Tag Variables
- One-time update per interaction
- Time To Live (TTL) of 5 minutes. Note: If a user interacts with an object and they are on the Experience page for more than 5 minutes, they will not be able to update the Tag Variable.
- Verification is not enforced. Note: The Tag Variable can be updated regardless of the Verification status of the interaction (true, false, null).
Batch Editing: Objects also can be edited in batches. When batch editing multiple objects, if an attribute field displays a value of “mixed,” this indicates that values vary amongst selected objects. Leave the attribute as “mixed” to keep the current values unchanged. Alternately, you may enter a new value to change across all selected objects.
