This documentation is for our legacy platform hosted at mtag.io. If you are using the Object Manager and Studio hosted at bluebite.com, see our Updated Documentation.
Custom Tag Attributes
Tag Data
Custom tag data allows you to create additional descriptive fields in addition to the object attribute fields set by the platform (Asset ID, Venue Name and more). With the use of macros, these additional fields can be used to create dynamic Experiences. See Macro Overview for further information.
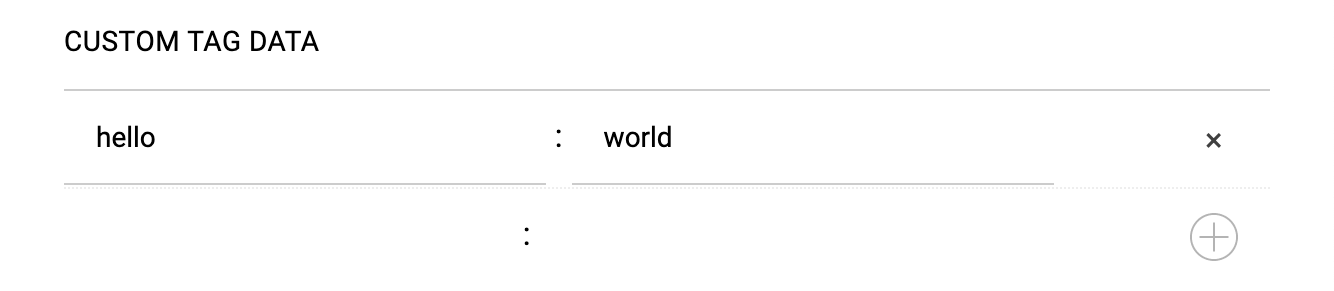
Example custom tag data entry:
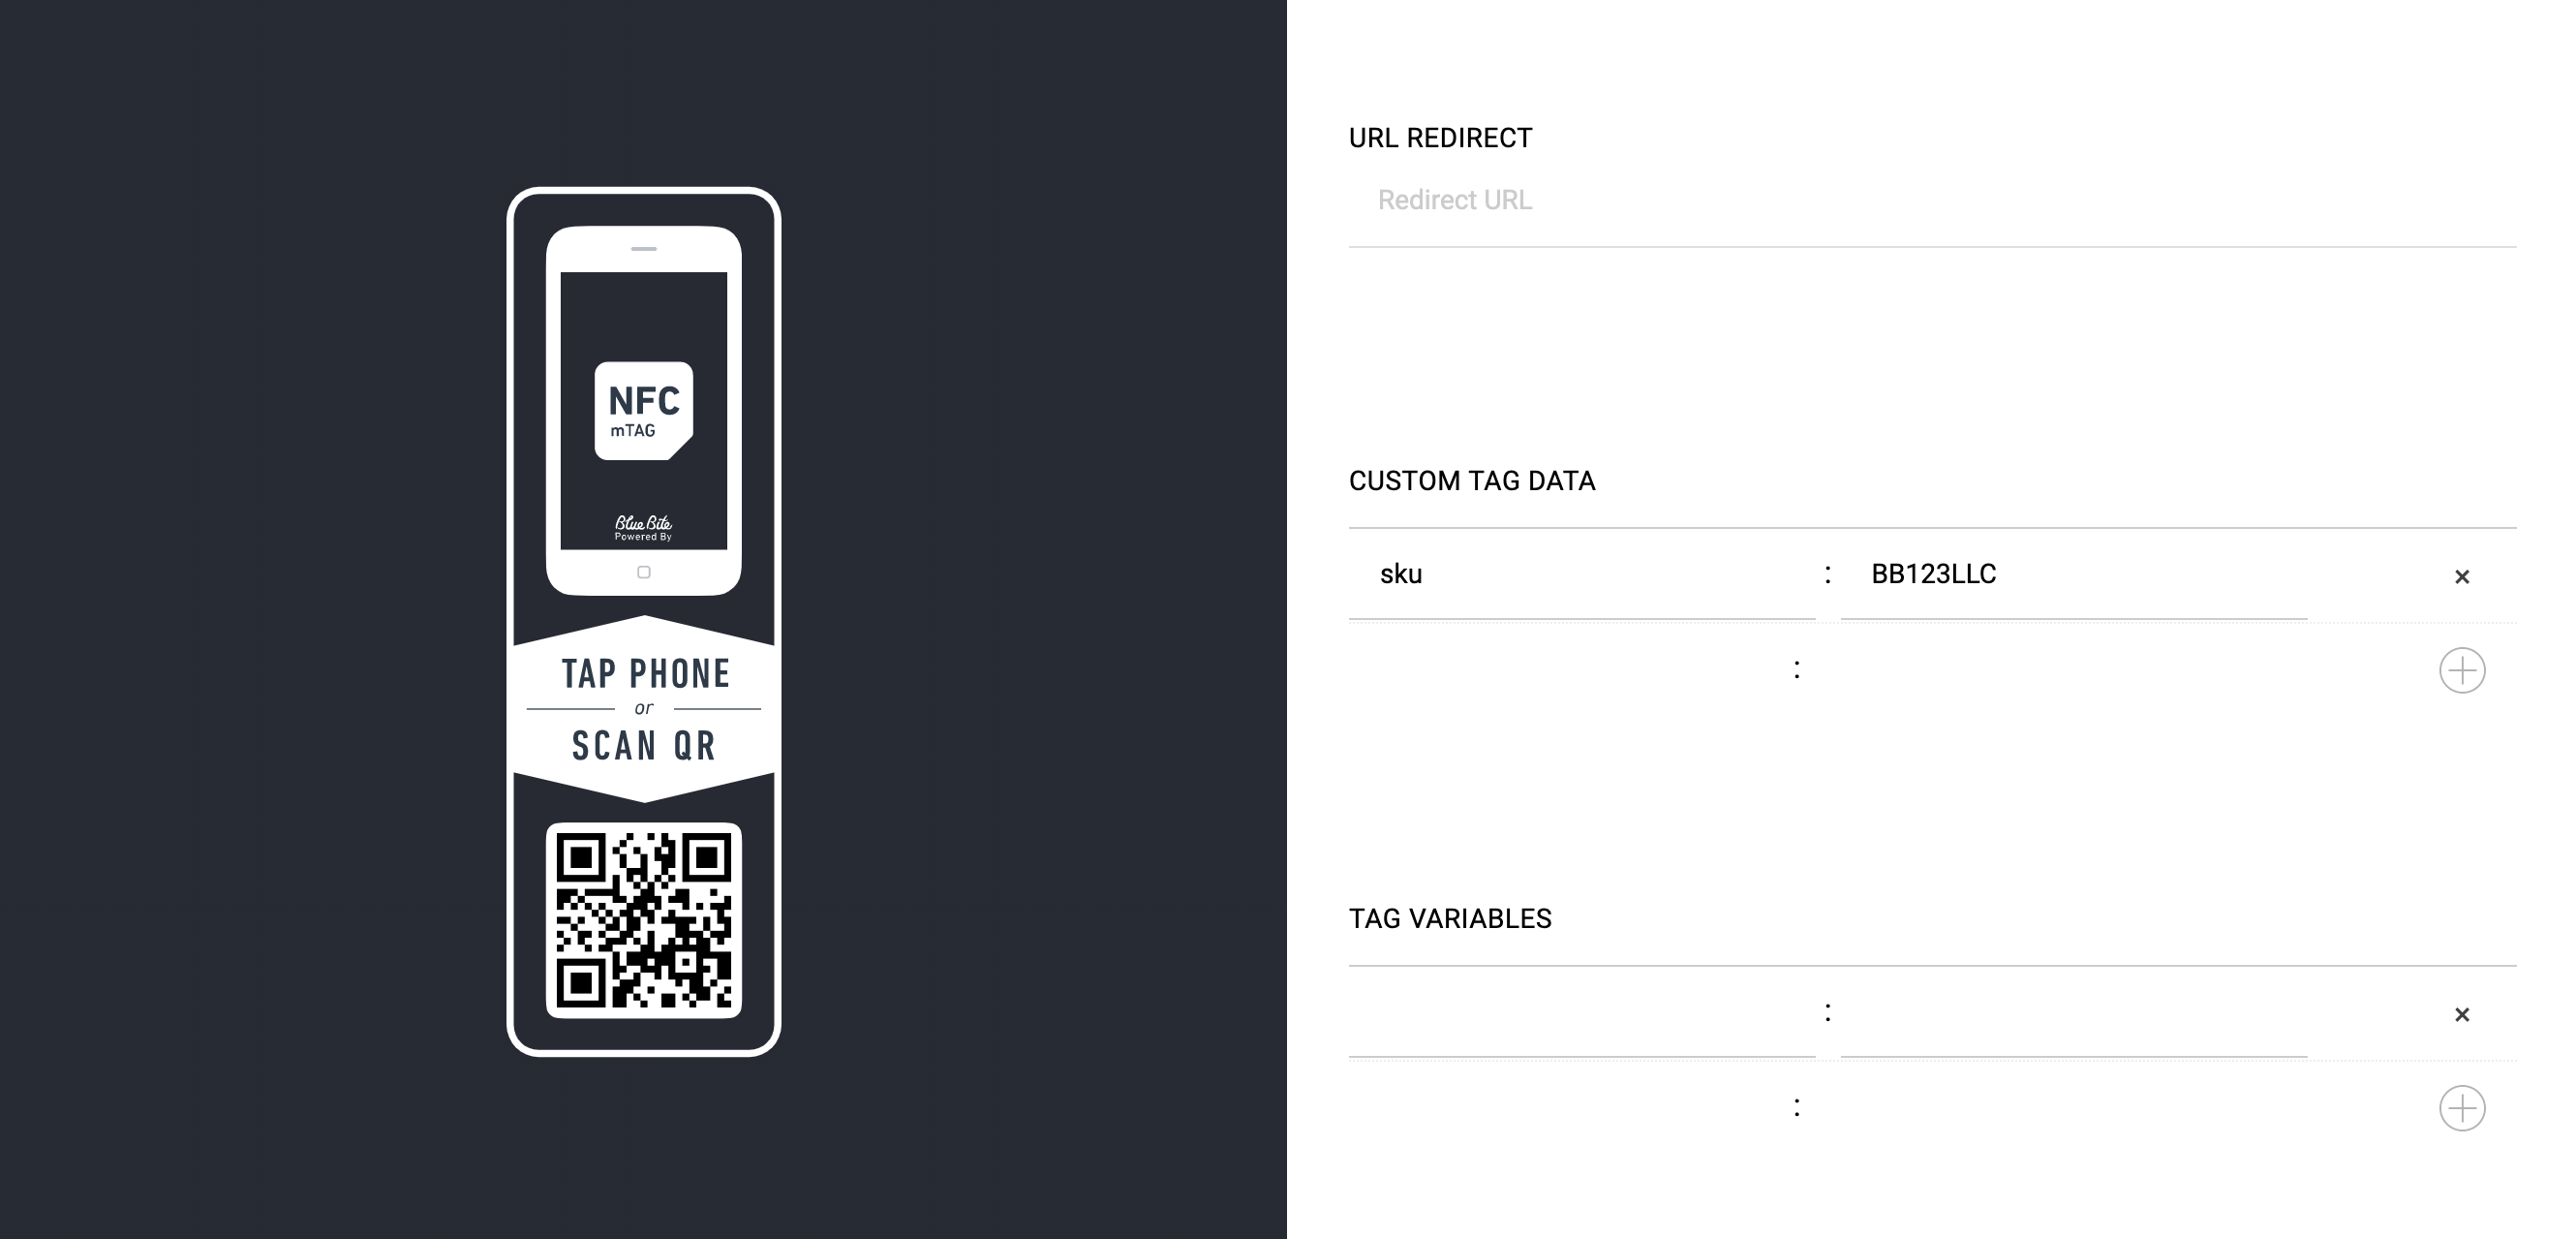
Tip: Don't forget to press the + icon
Tag Variables
While users cannot change tag data properties such as Location, Asset ID, Venue Name, utilizing tag variables allows them to add data which will alter how that object displays its Experience. Tag variables are object properties, similar to custom tag data. However, the tag variable value can be set to update when consumers interact with the Experience in different ways.
Example
One common use case for this is product registration. When users register an object, the Experience content subsequently changes.
1. Enter a custom tag variable in mTAG Object Editor.
a. Go to “Advanced” editing section.
b. Add a new tag variable with the Key : registered and Value : false


2. Add a Button to the Studio file with these settings.
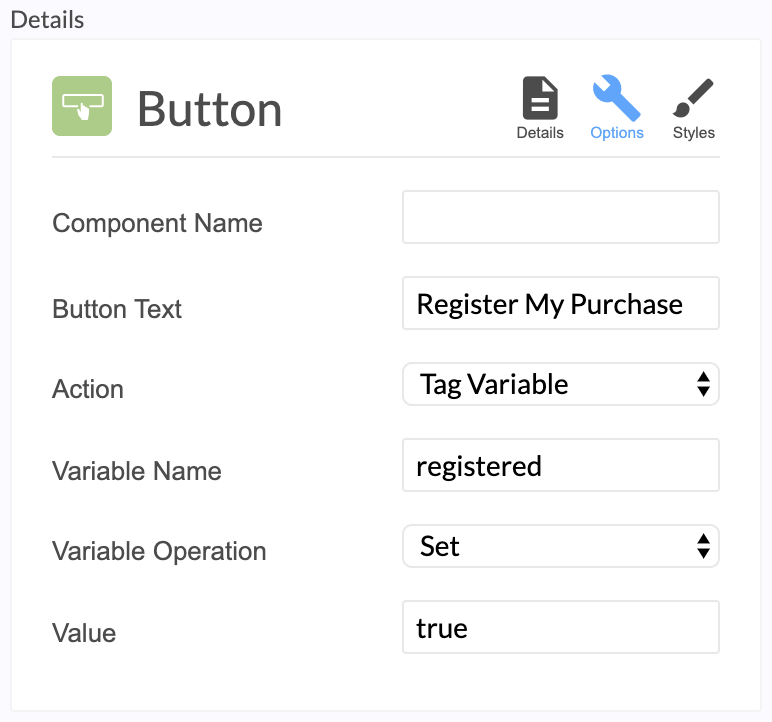
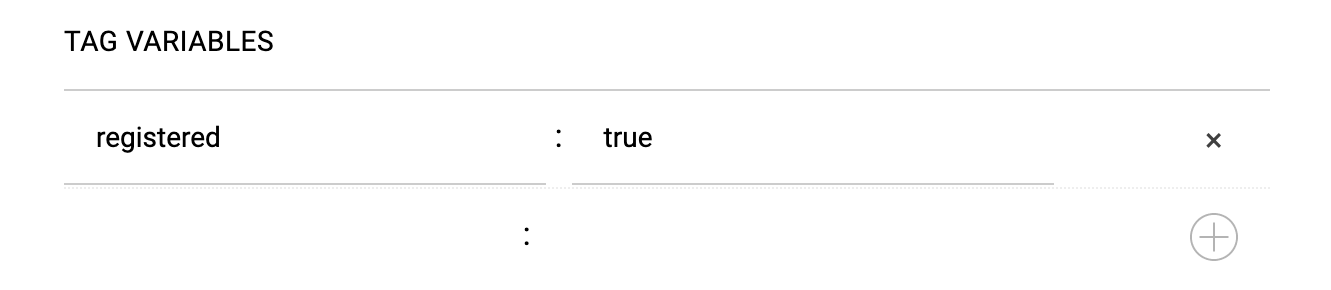
3. When the user clicks "Register My Purchase" in the Experience, the Registered status of the object will change from "false" to "true" and the tag variable value will update in the Dashboard.
Dashboard:

4. The Experience is dynamic, changing once the object is registered.
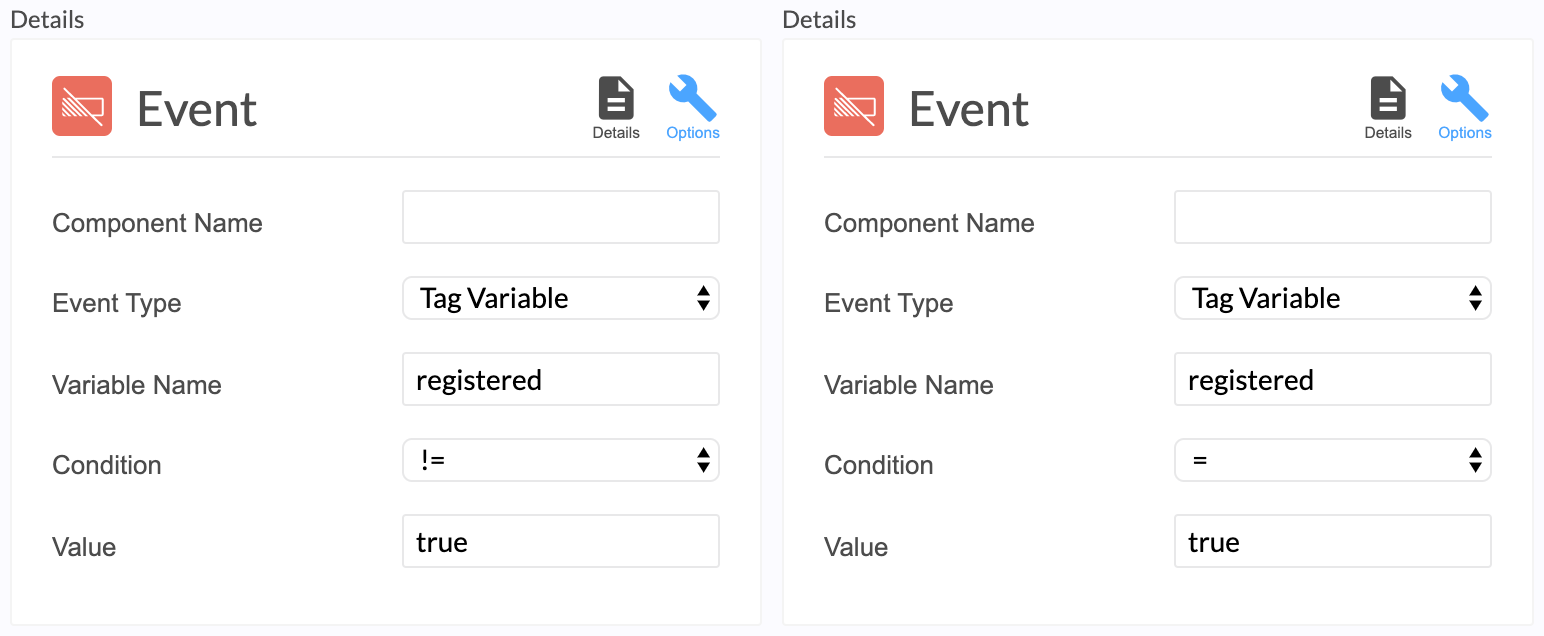
Create pre- and post-registration Experiences within the same Studio File. Drag and drop components within event wrappers to make them specific to the pre- and post-registration experiences.
Specifications for Updating Tag Variables
1. One-time update per page load
2. Time To Live (TTL) of 5 minutes
a. If a user interacts with an object and they are on the Experience page for more than 5 minutes, they will not be able to update the tag variable.
3. Verification is not enforced
a. The tag variable can be updated regardless of the Verification status of the interaction (true, false, null).
Whitelisting
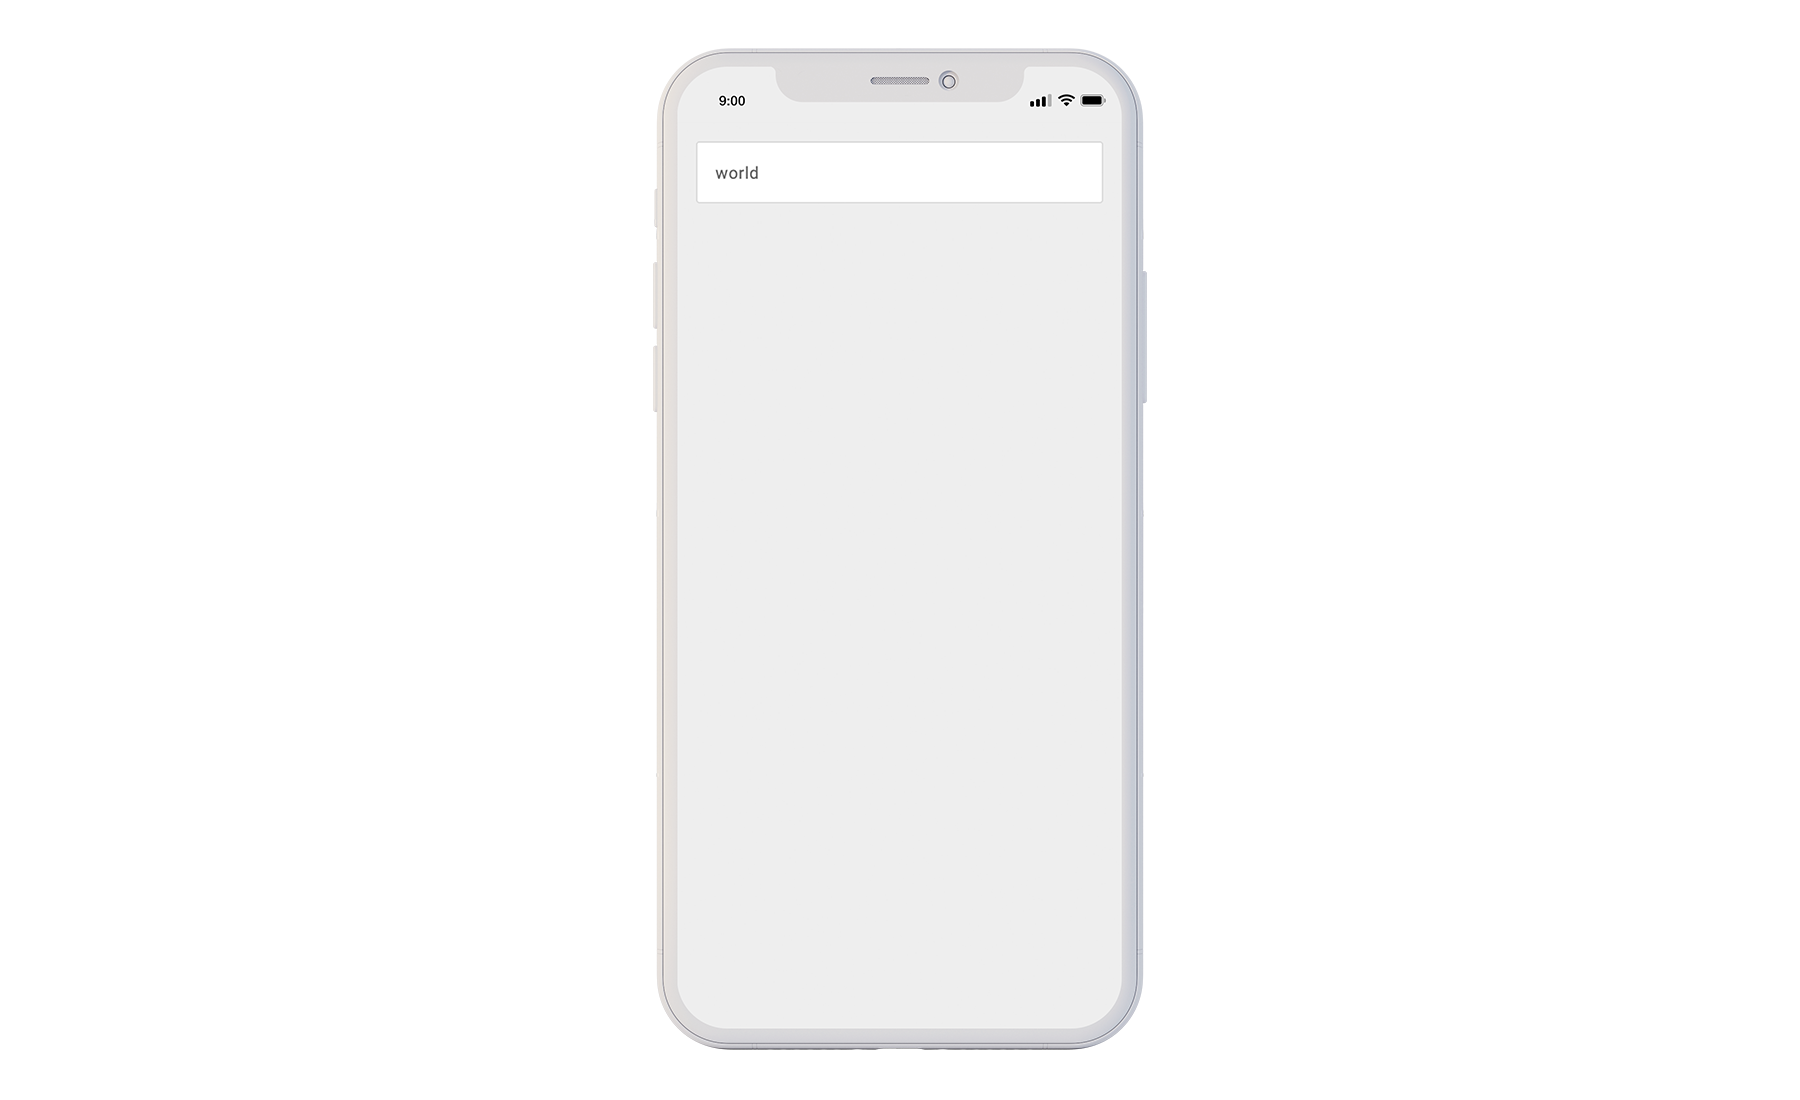
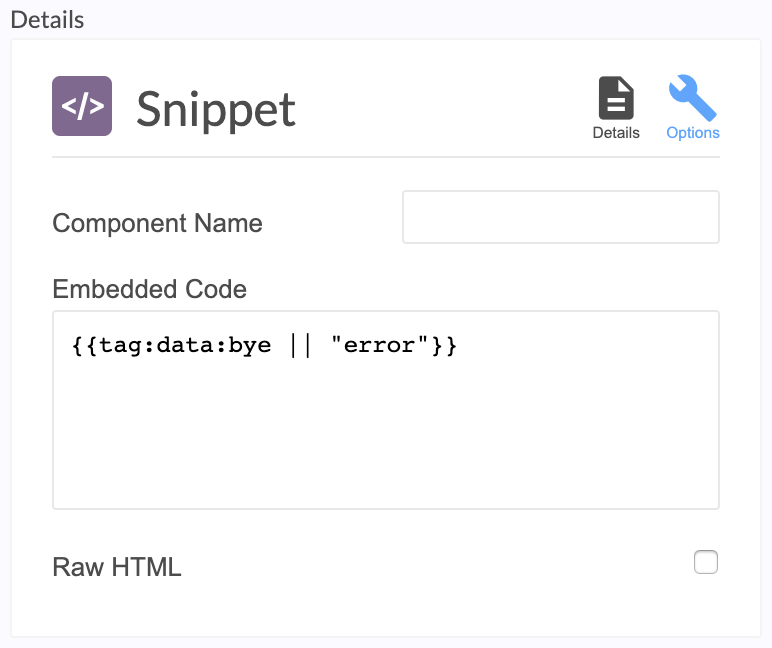
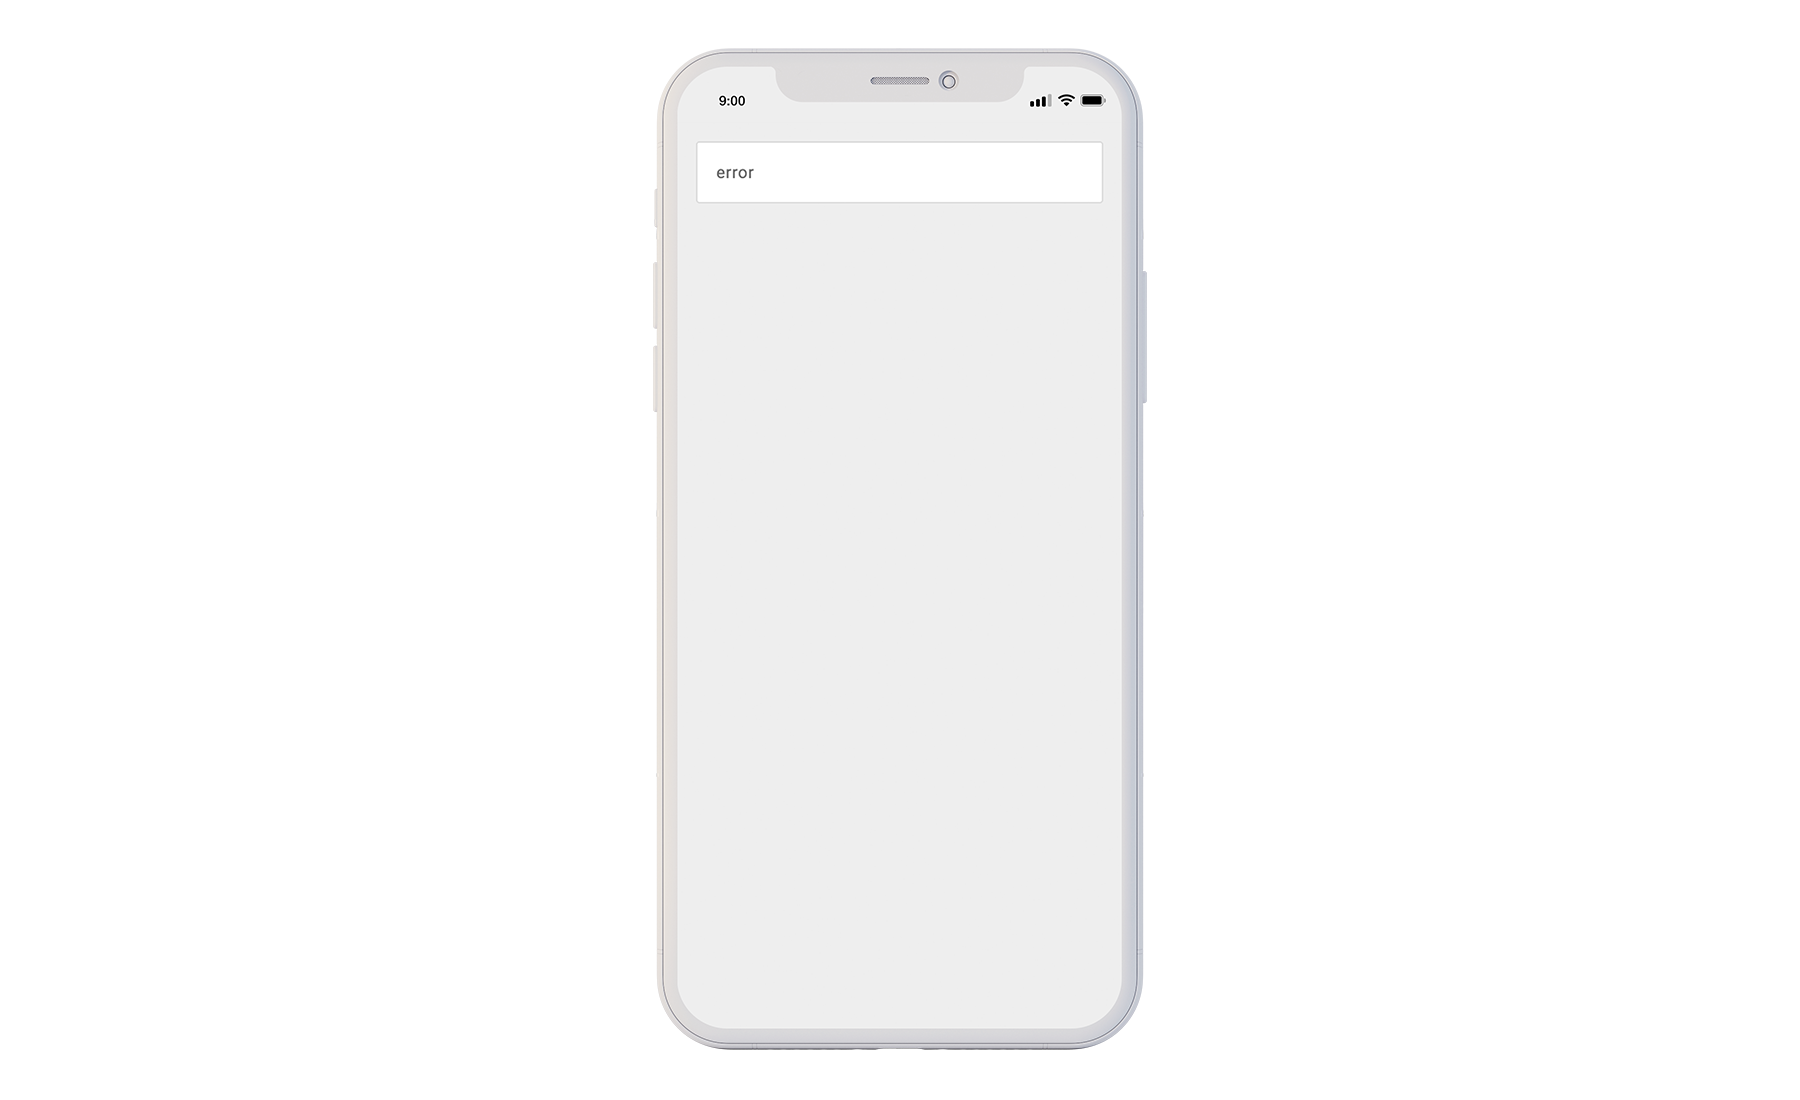
For tag variables and custom tag data, macros will only return an output for the list of keys whitelisted in the Object Editor in the Dashboard. Essentially, all keys will not function except those programmed in the Dashboard. The platform supports up to 30 tag variables per tag. In the example below, the key “hello” is whitelisted in the Dashboard, while the key “bye” is not.
1. Custom tag data is configured as follows: Key : Hello and Value : World
2. When the macro {{tag:data:hello || "error"}} is used in the Studio, the output world renders in the mobile experience display:

3. If the macro {{tag:data:bye || "error"}} is used in the Studio, the fallback will render as bye is not a pre-programmed key associated with the object:
Data Prefixes
- No Prefix {{ tag:data:<key> }}|
- Public {{ tag:data:public.<key> }}
- Private {{ tag:data:private.<key> }}
- Exclusive {{ tag:data:exclusive.<key> }}
No Prefix
{{tag:data:<key>}}
When no prefix is utilized, the macro will always expand with every interaction.
Example:
1. Custom tag data configuration in the Dashboard:
2. Macro used in Studio file: {{tag:data:hello || “error”}}
3. The data output will always show:
Public
{{tag:data:public.<key>}}
Similar to if there were no prefix, when the public prefix is used, the macro will always expand with every interaction.
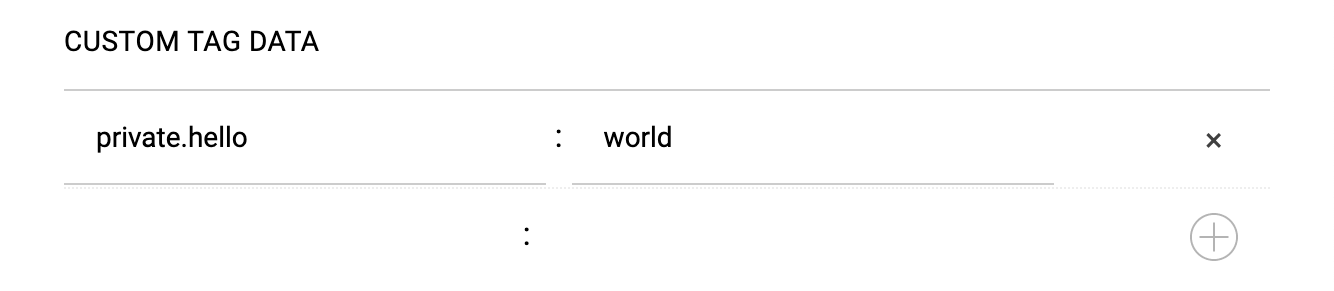
Private
{{tag:data:private.<key>}}
When the private prefix is utilized, the macro will never expand and the output will never show.
Example:
1. Custom tag data configuration in the Dashboard:
2. Macro used in Studio file: {{tag:data:private.hello || "error"}}
3. The fallback renders in the mobile experience display:
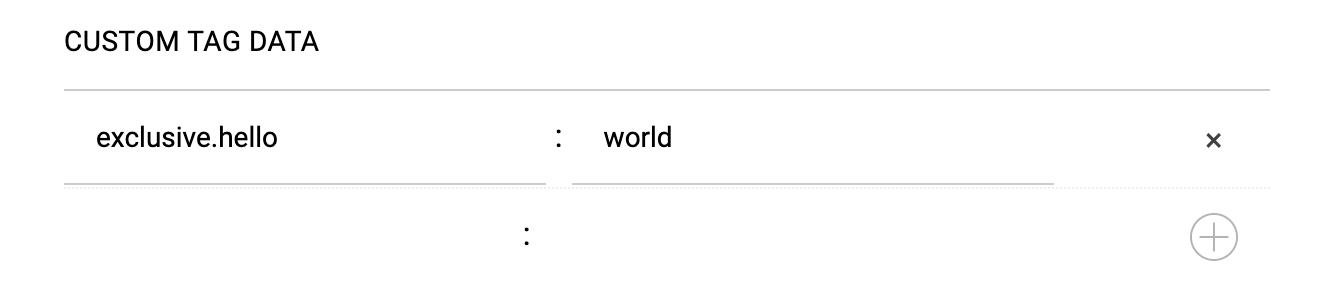
Exclusive
{{tag:data:exclusive.<key>}}
When the exclusive prefix is used, the macro will only expand after a verified interaction.
Example:
1. Custom tag data configuration in the Dashboard:
2. Macro used in Studio file: {{tag:data:exclusive.hello || "error"}}
3. Mobile experience display when verified = true:
4. If not a verified tap, the fallback is displayed:
