


This first part of this article walks you through the steps to create Blue Bite Objects that represent physical QR codes. The second part of the article explains how to create a QR code to print on your packaging.
Create Blue Bite Objects
Follow these steps to create Blue Bite Objects to connect with your QR Codes. If you only need to create a QR code, skip forward to that documentation at the bottom of this article.
Step 1
Log into the Blue Bite Object Manager. Select the ‘Projects’ tab.

Step 2
Click on the ‘Plus’ icon next to the ‘Projects’ title.
**If you have an existing project you would like to use skip to step 5
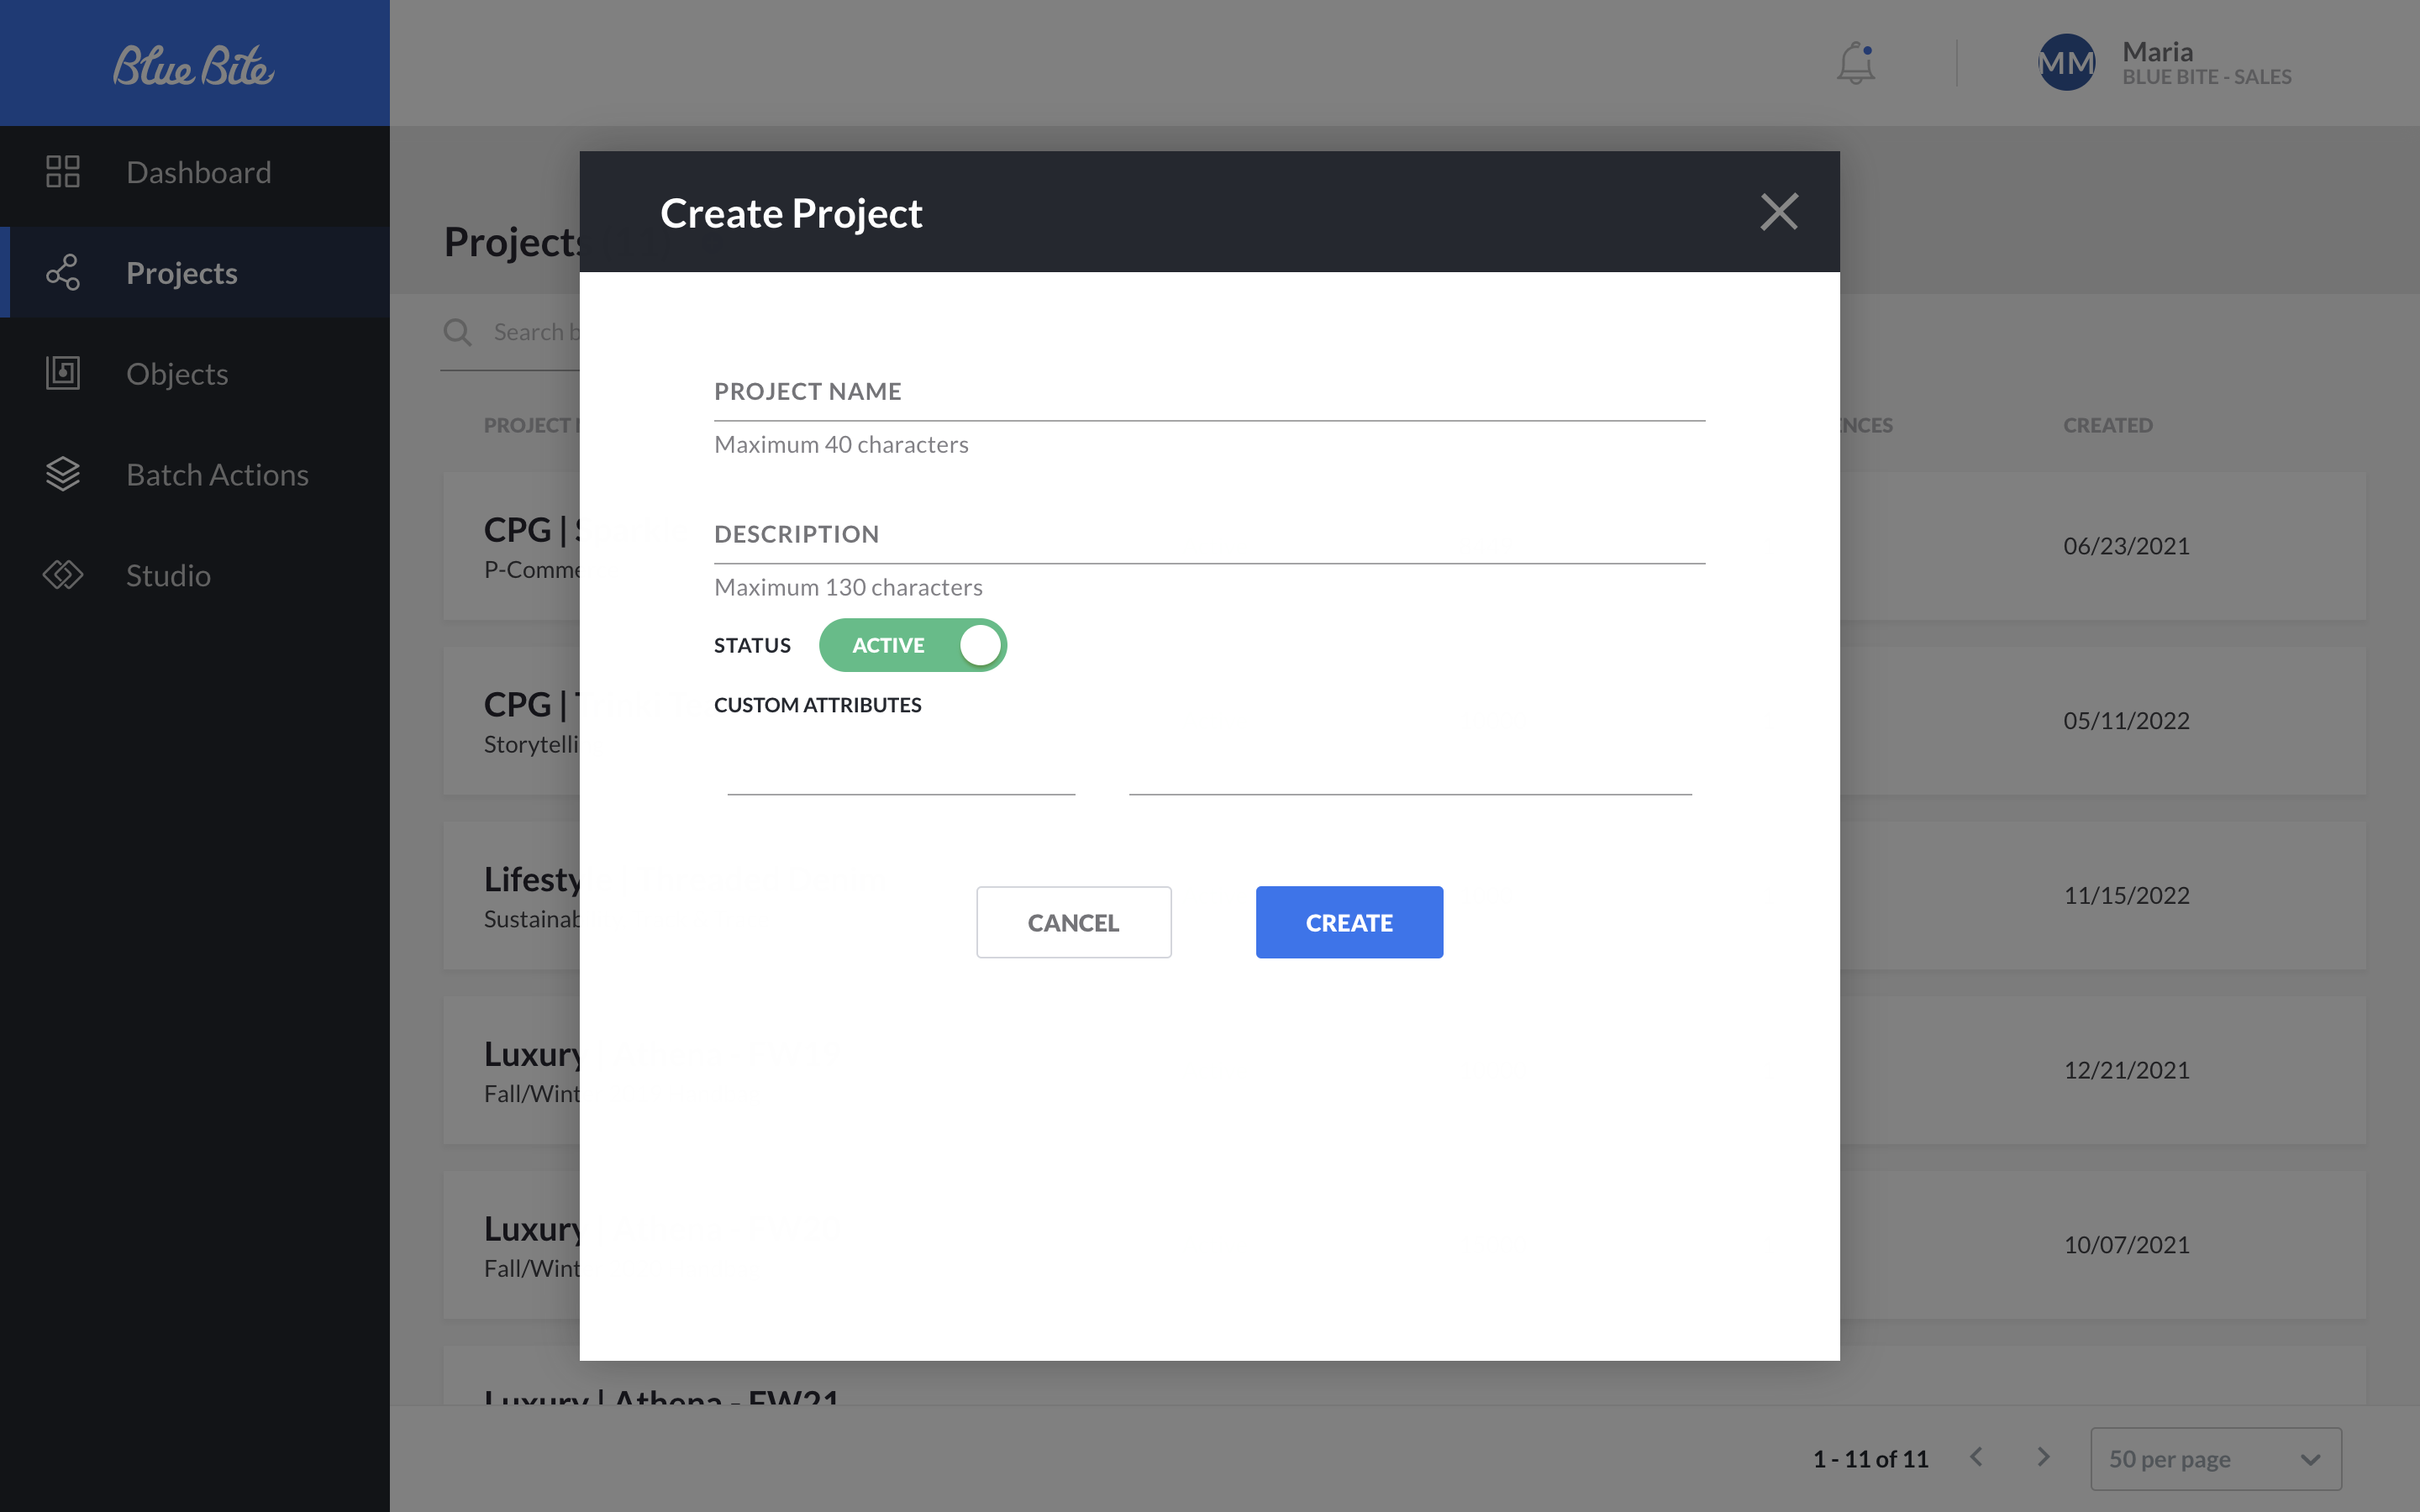
Step 3
A ‘Create Projects’ window will pop up, fill out the information about your new project, then press ‘Create’. Return to the projects screen and locate your new project.
Step 4
Scroll down on the project screen to find the objects section on the bottom left. Click the ‘ADD OBJECTS’ button.

Step 5
A ‘Create Objects’ window will pop up. To create a QR code, select the ‘Blue Bite QR (UUID)’ touchpoint option.
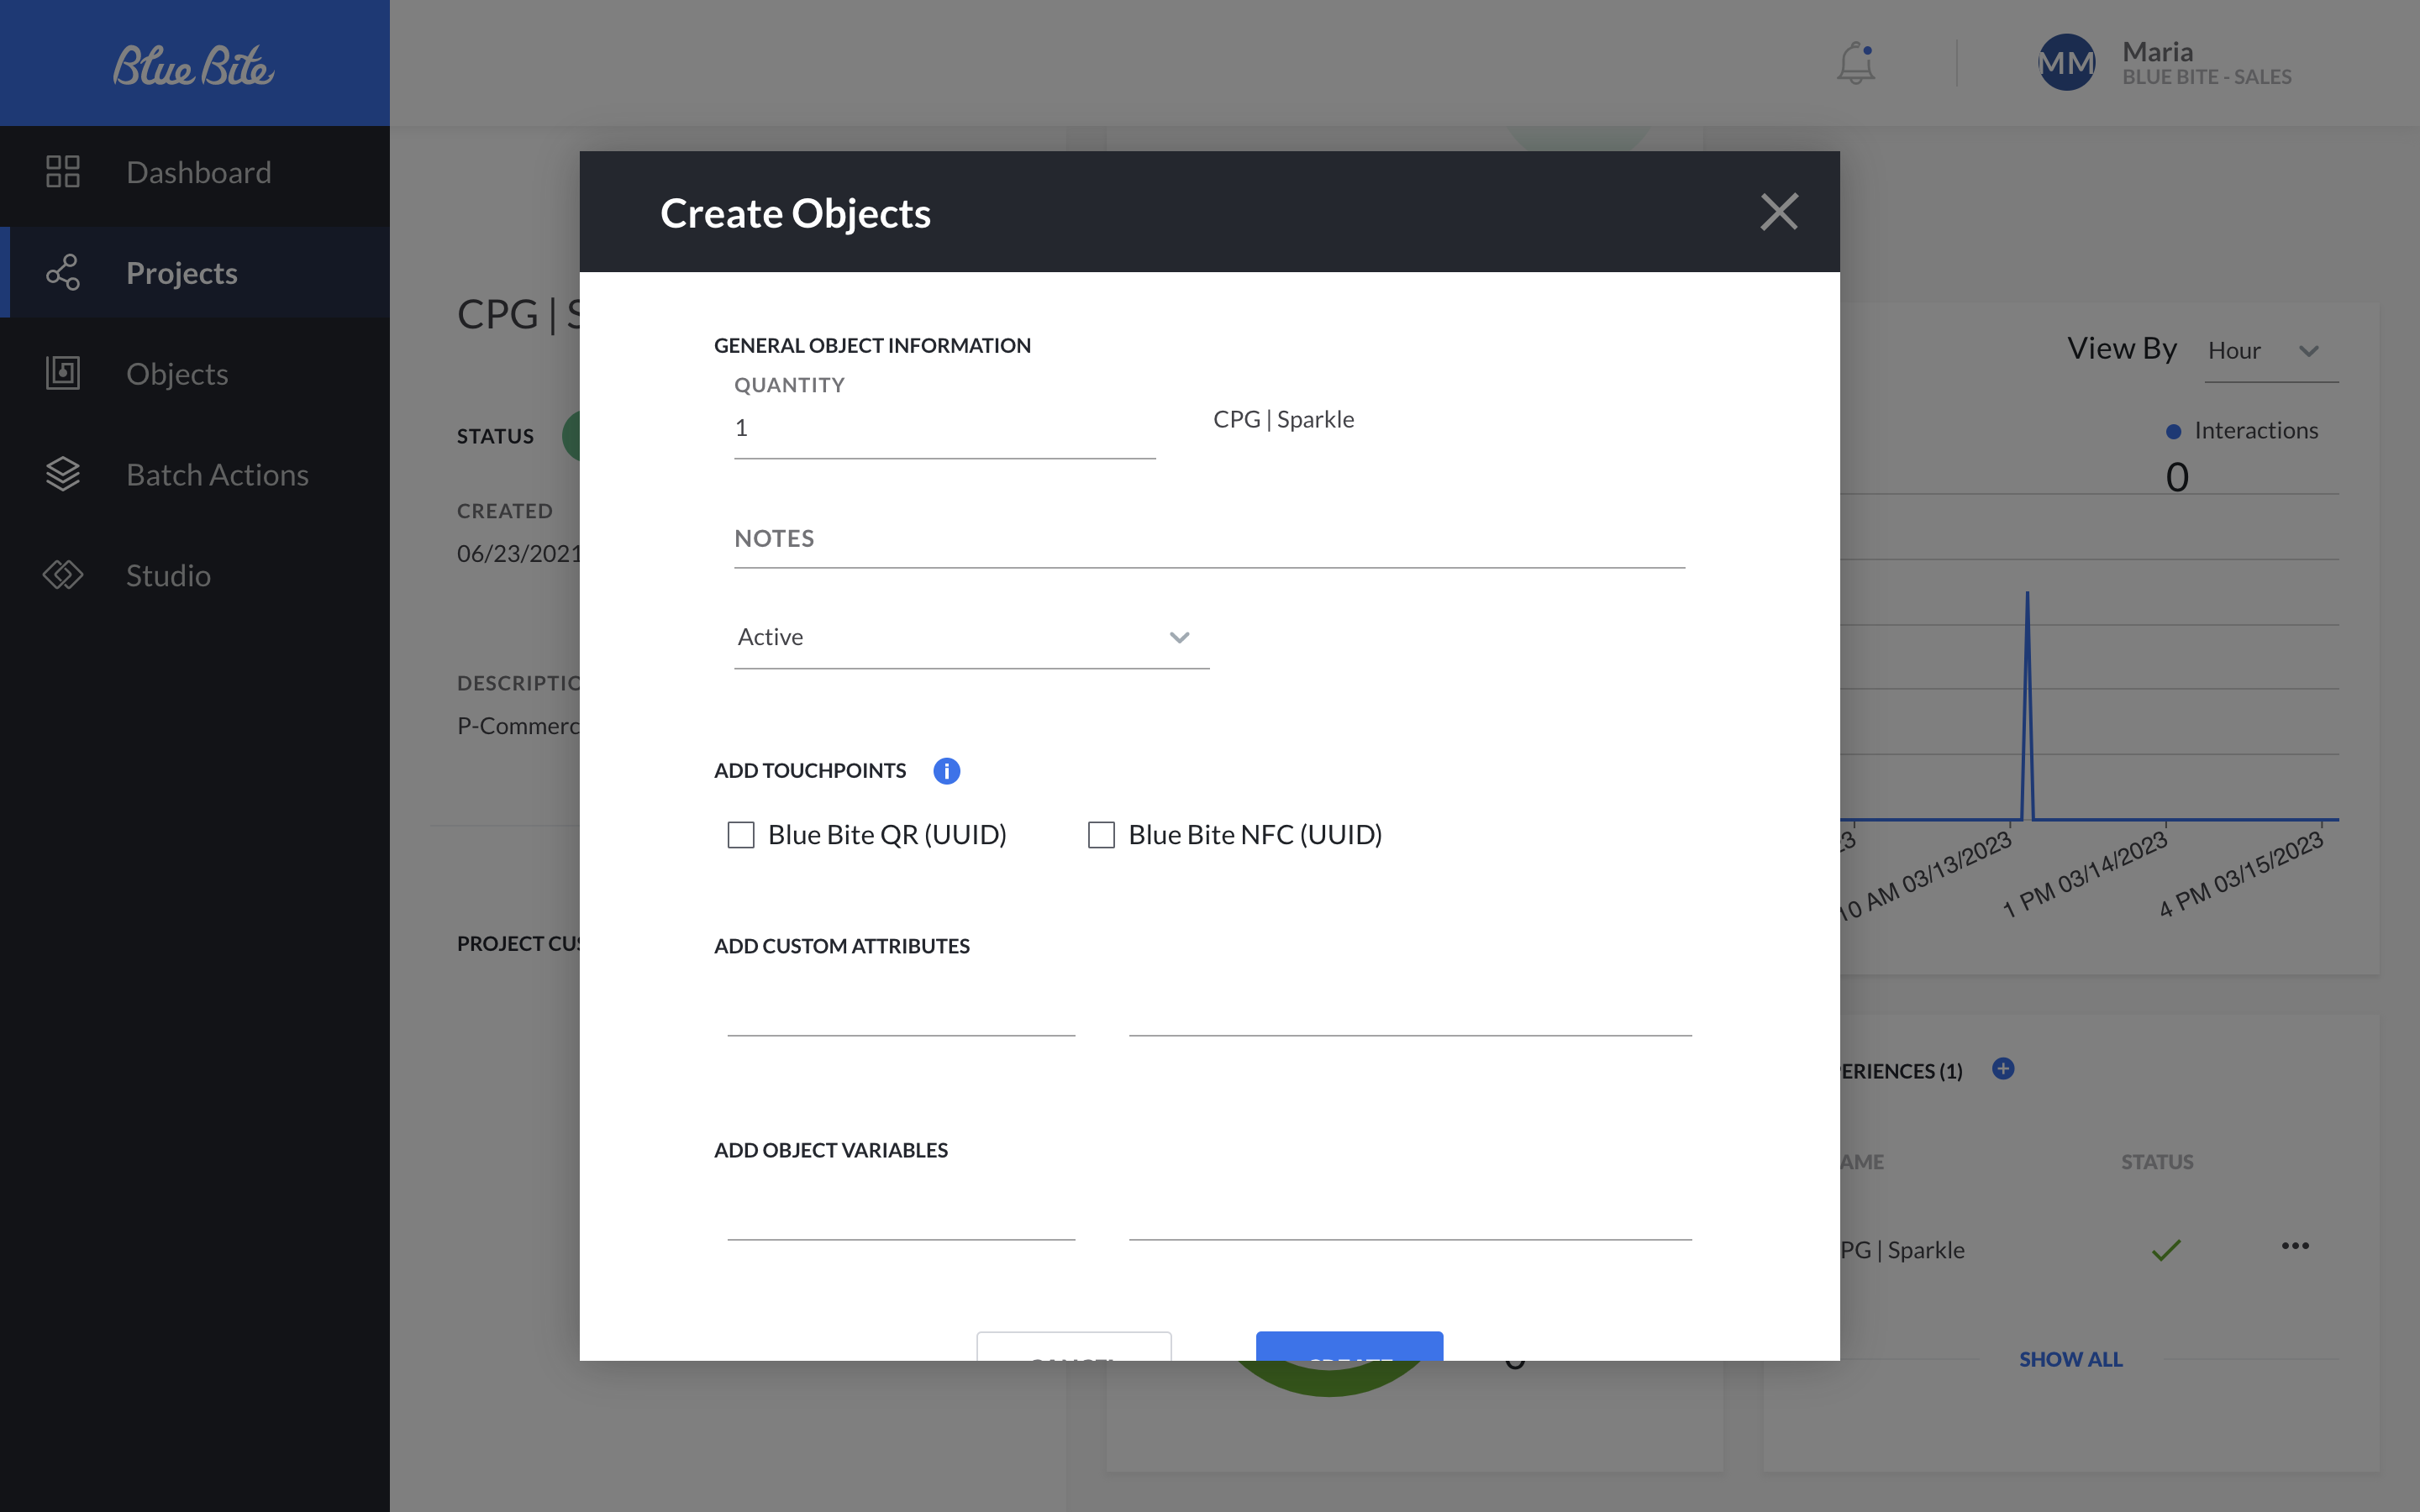
Once you have added the information to your new object click on the ‘CREATE’ button.
Step 6
You will be redirected to the ‘Projects’ dashboard. Again, scroll down to locate the object’s section and click on ‘View All.’ This is located in the center of the circle stating the number of total objects. If your new object(s) do not appear, try refreshing the page.
After clicking the ‘View All’ button, you will be routed to the ‘Objects’ screen.

Step 7a
As another way to add a touchpoint, you are able to add them individually to new objects. Select the object you want to add a touchpoint to.

Select the ‘Add Touchpoint’ button on the screen. From there you will be prompted to select either QR or NFC. After making your selection a URL will show under the “touchpoints” tab.
Step 7b
If you only need to create a QR code for a singular object, copy the URL that was created and paste it into the QR code creator of your choosing. If this is the case skip forward to “QR Code Studio Documentation” Step 1a.
Step 8
On the objects screen, you can select an object by clicking the check box next to its UUID or select all objects by selecting the check box to the left of the column headers.

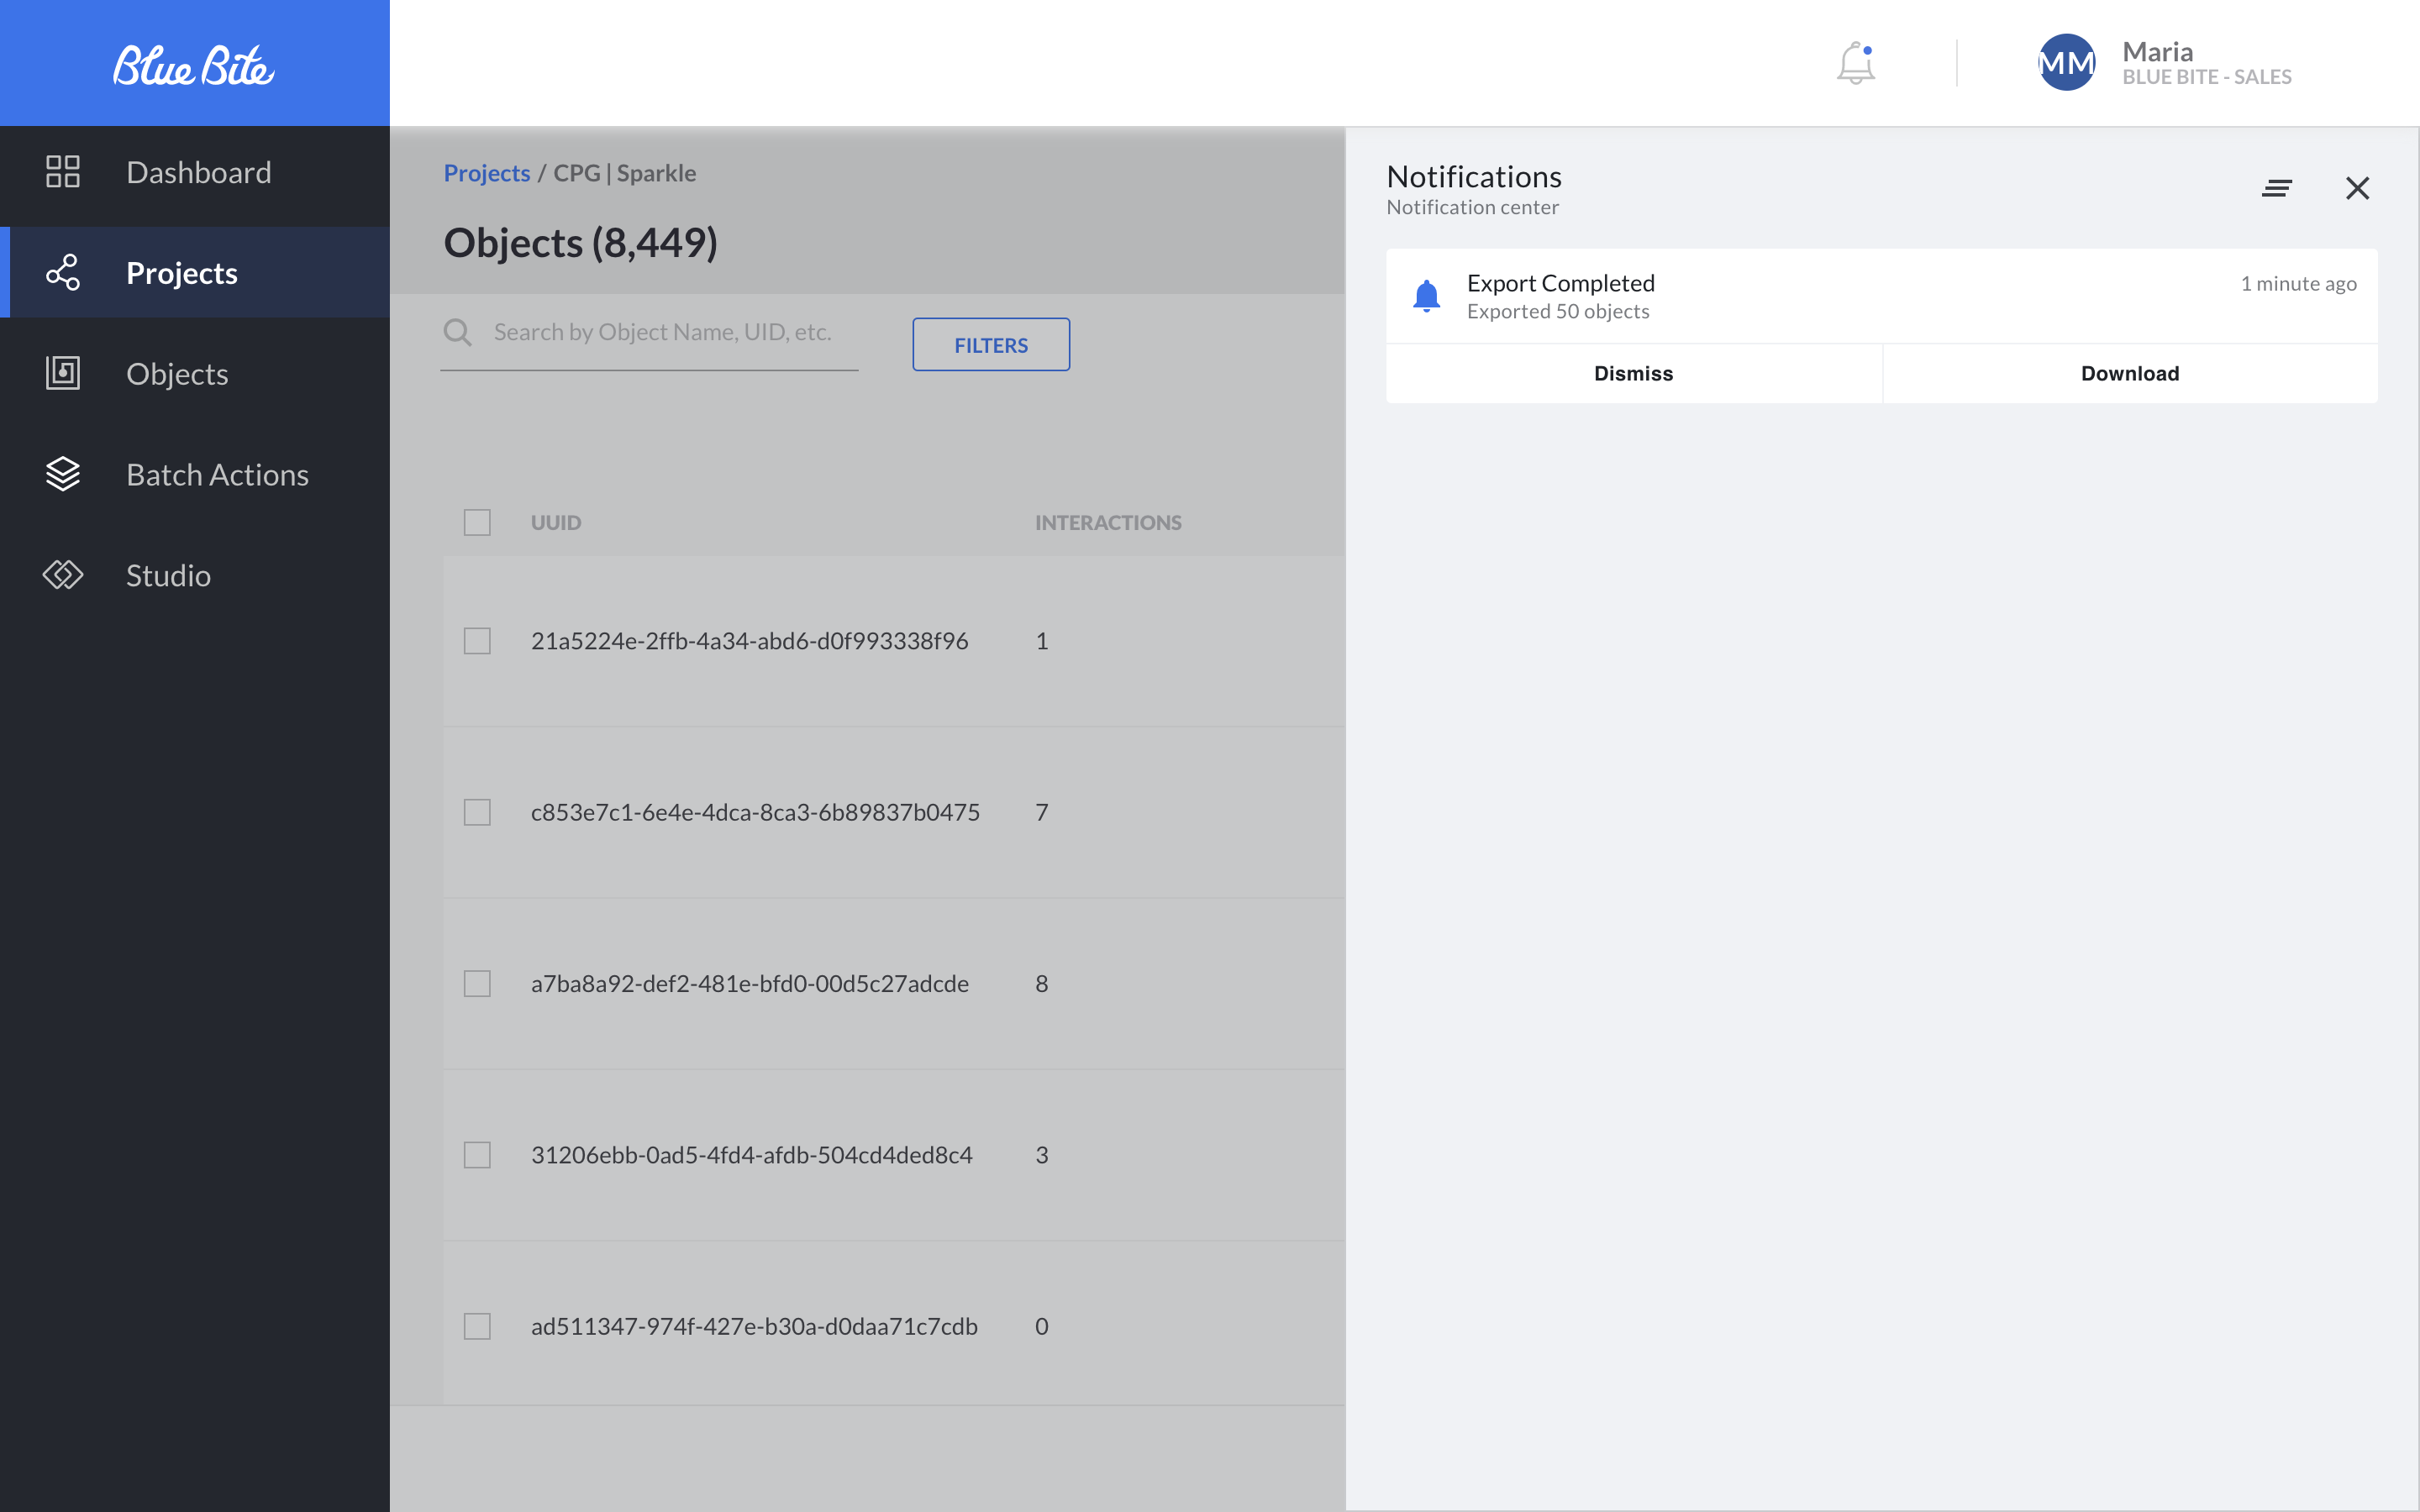
Once you have selected your objects, it’s time to export them. A blue header will appear with the options ‘Batch Edit’, ‘Export’, and ‘Delete’. Select the ‘Export’ button.
Once the export has been completed you will receive an ‘Export Completed’ notification on the upper right hand corner of your dashboard.
Step 9
Click on ‘Download’ in the notifications tab. A csv file will be downloaded to your computer which will be used later.
Create a Single QR Code
Step 1
Login to the QRCode Studio and navigate to the dashboard. Click the blue “+ Create QR Code Button.”
Step 2
Choose the URL option. This will direct you to the screen to enter in URL from the BlueBite Dashboard and name the QR code to be able to find it easier in the future. You can also assign the QR Code to a campaign on this page.
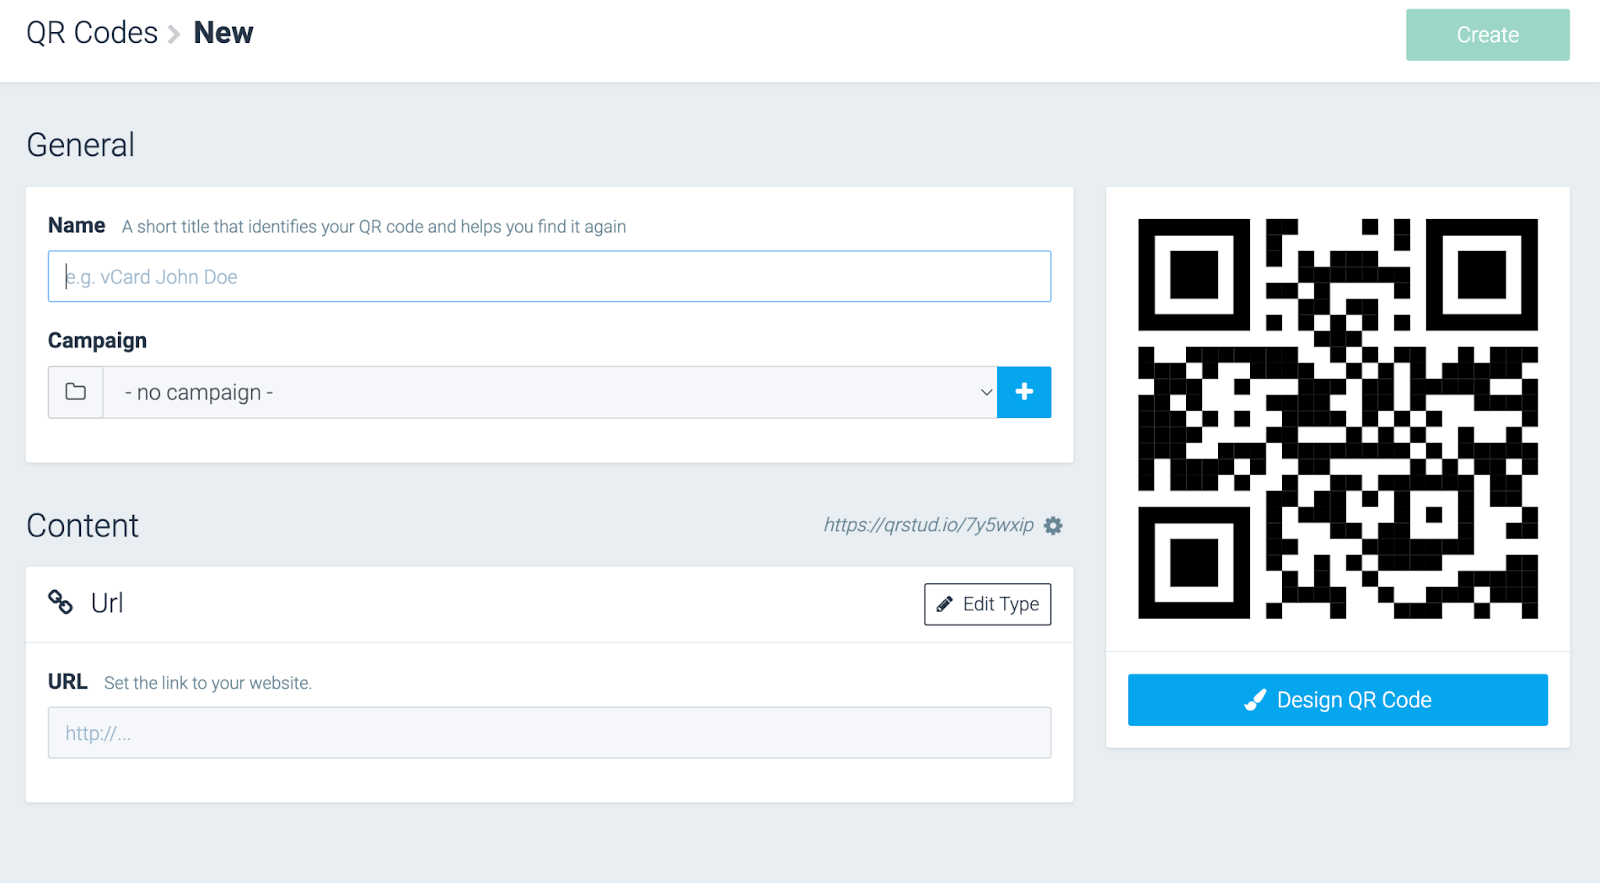
Step 3
Click the green create button at the top right.
Creating Multiple QR Codes
Step 1
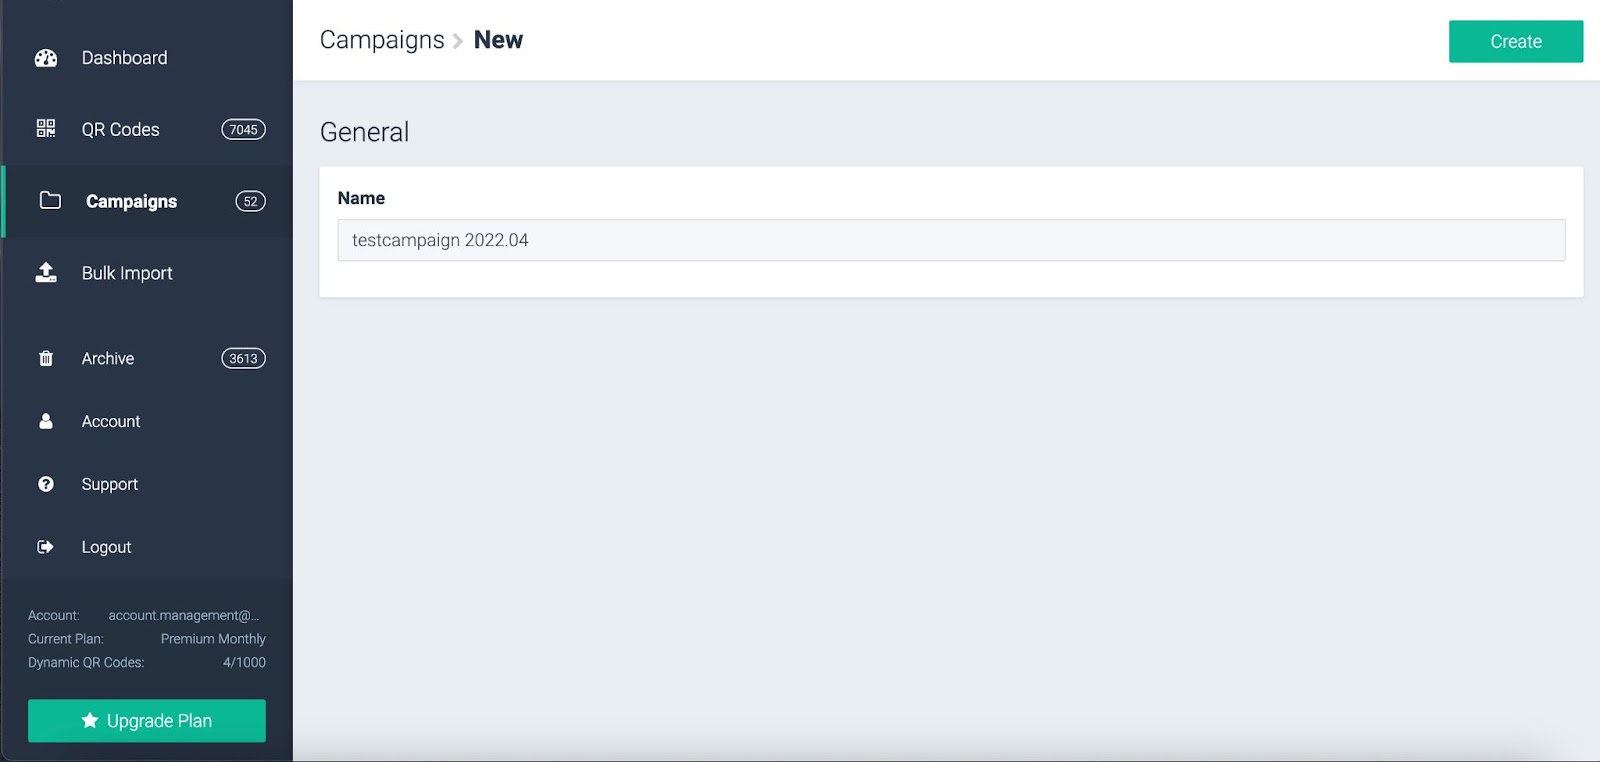
Login to QRCode Studio. From the dashboard screen go to ‘Campaigns’

Step 2
Once in the ‘campaigns’ screen click on the blue ‘Create Campaign’ button on top of your screen. After prompted, name your campaign and click the ‘Create’ button on the upper right of the screen.
Step 3
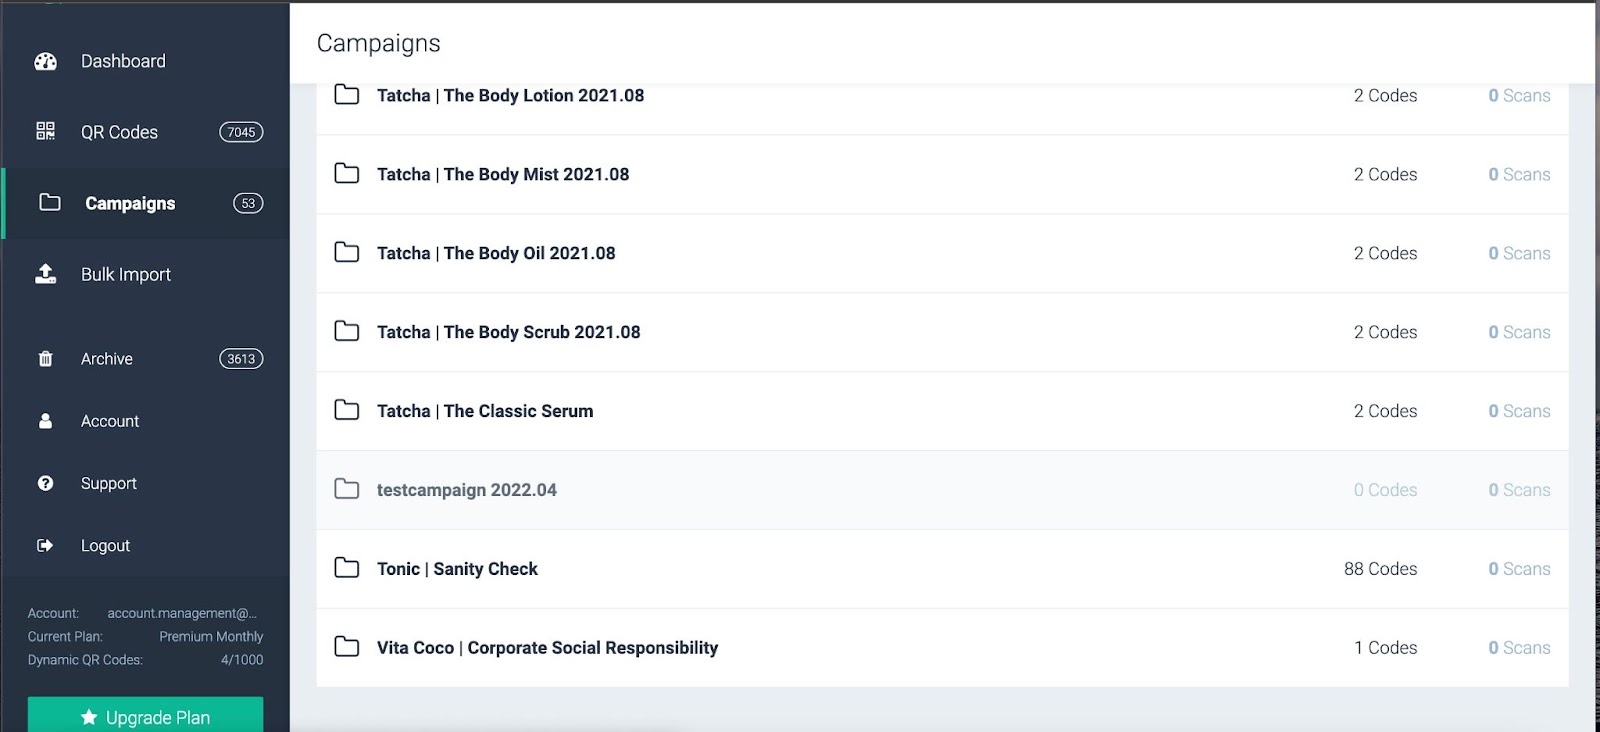
Once your campaign is created, the campaign folder will appear towards the bottom of the page.
Step 4
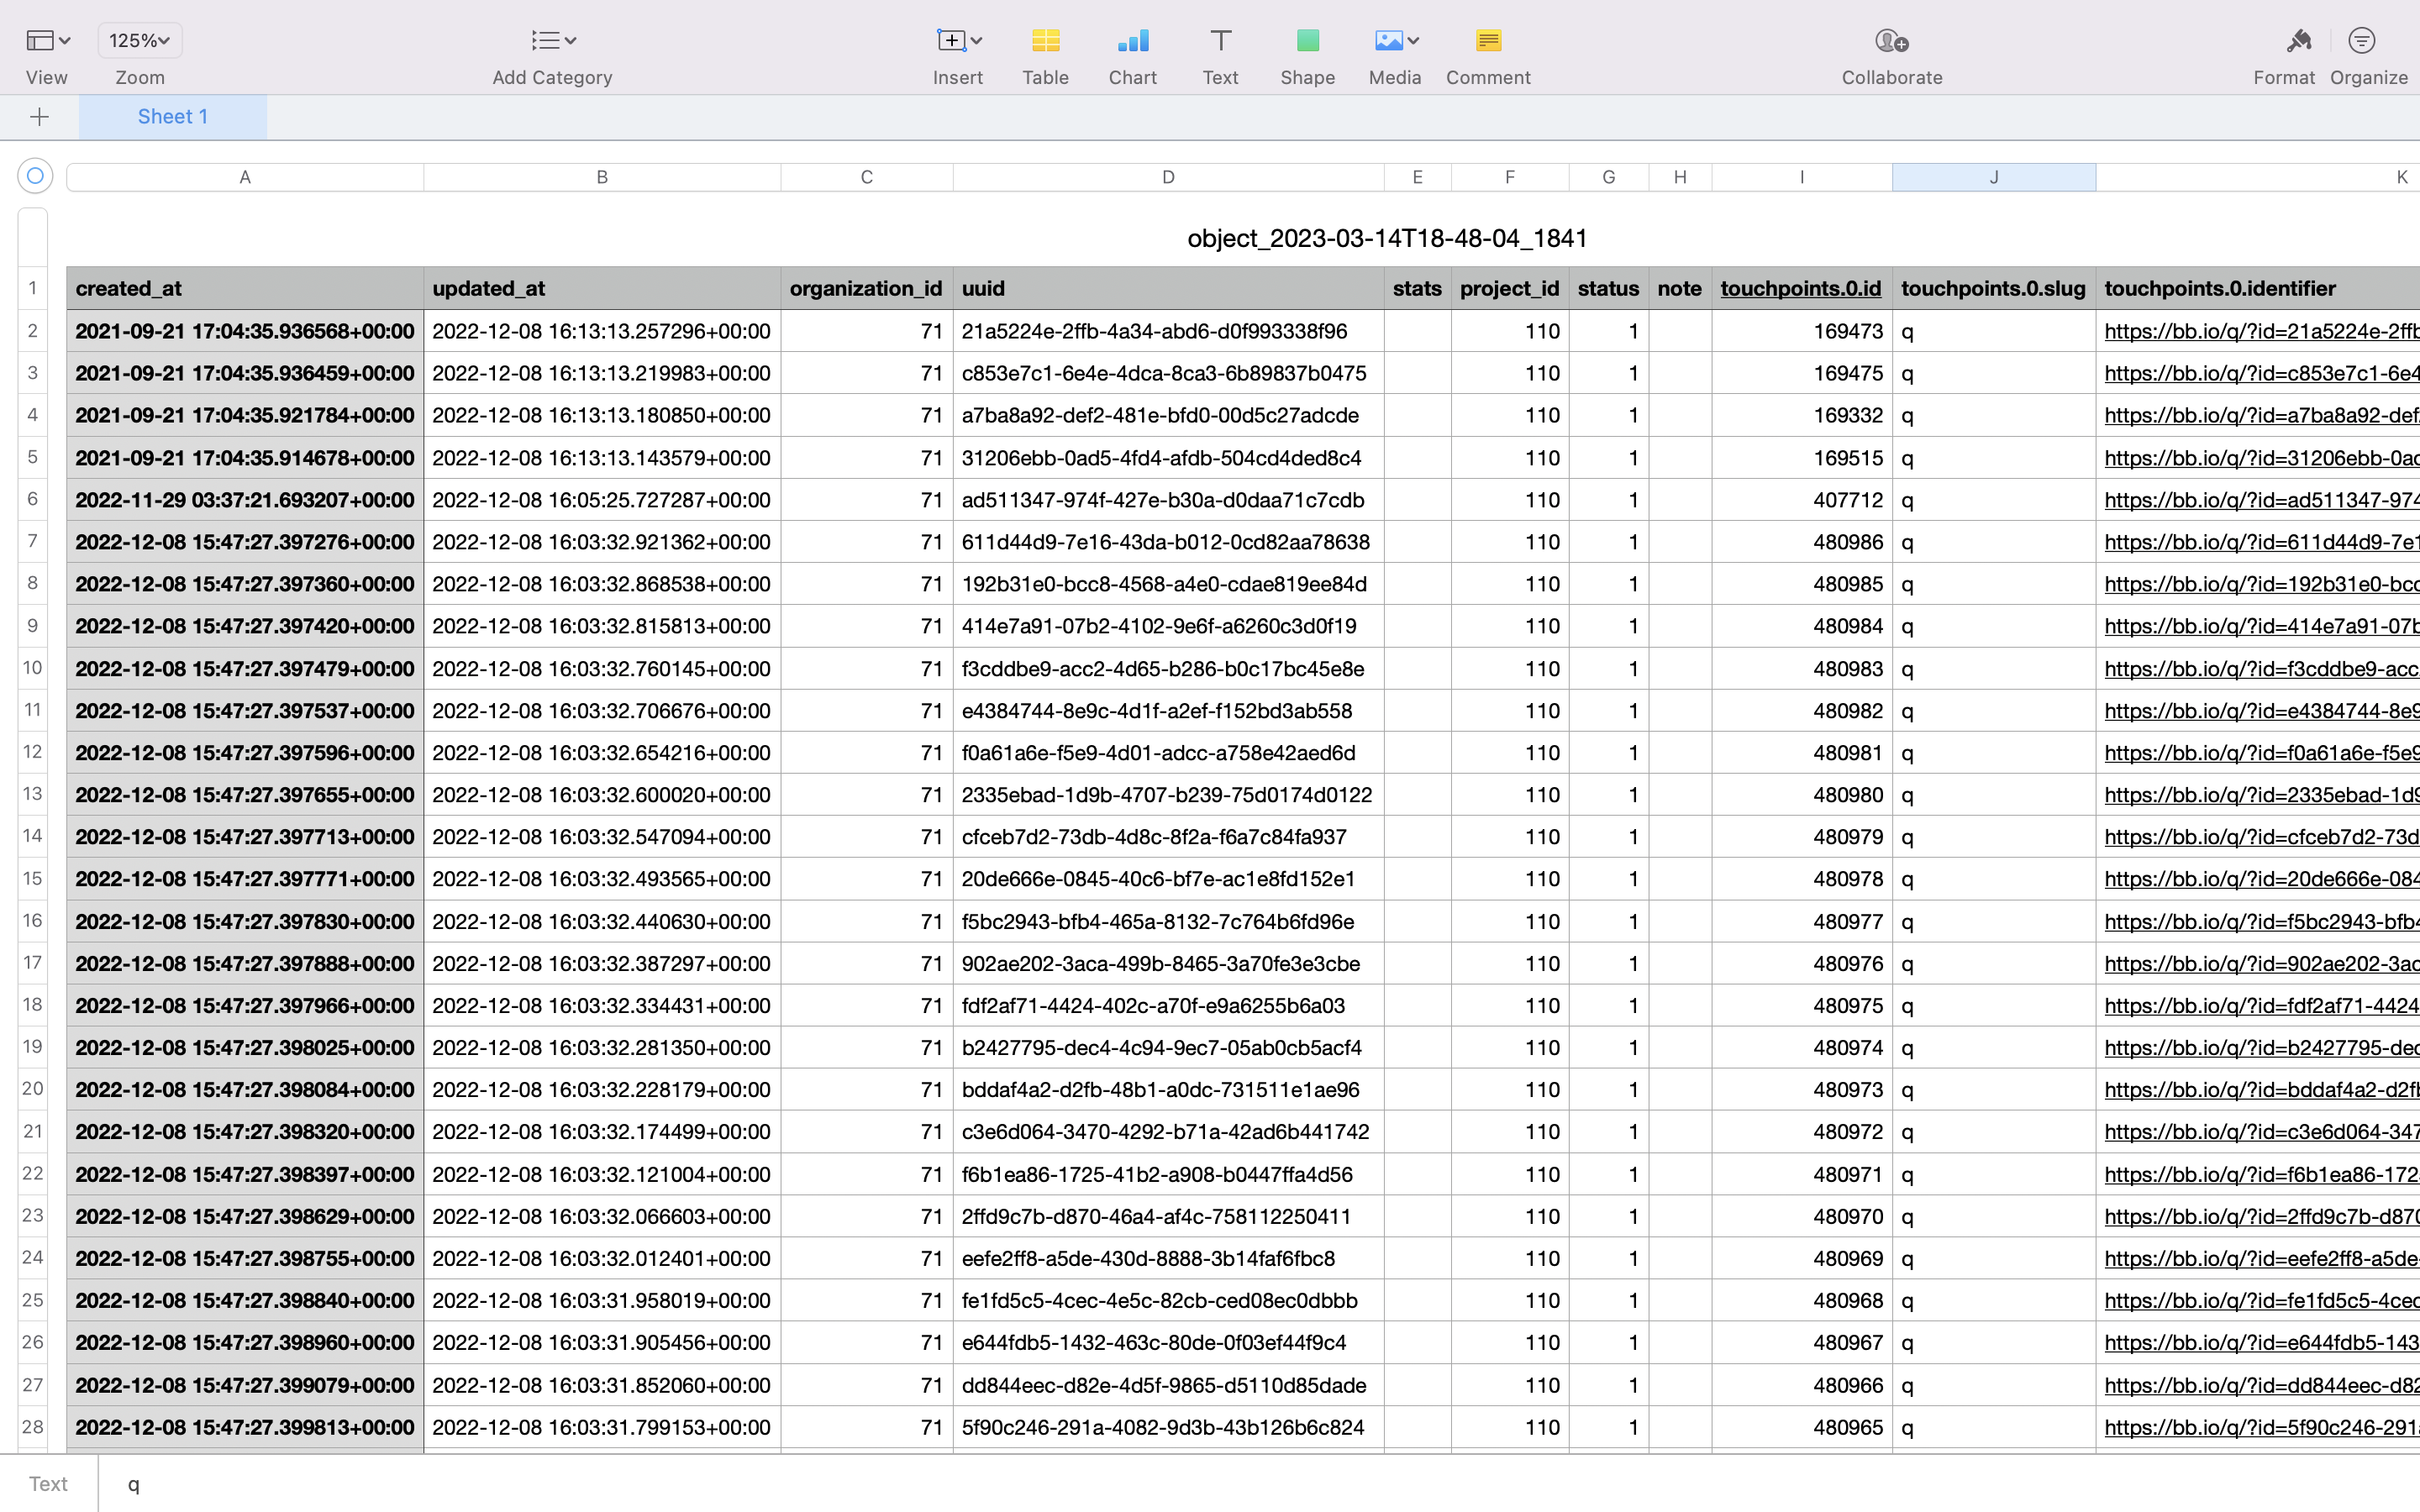
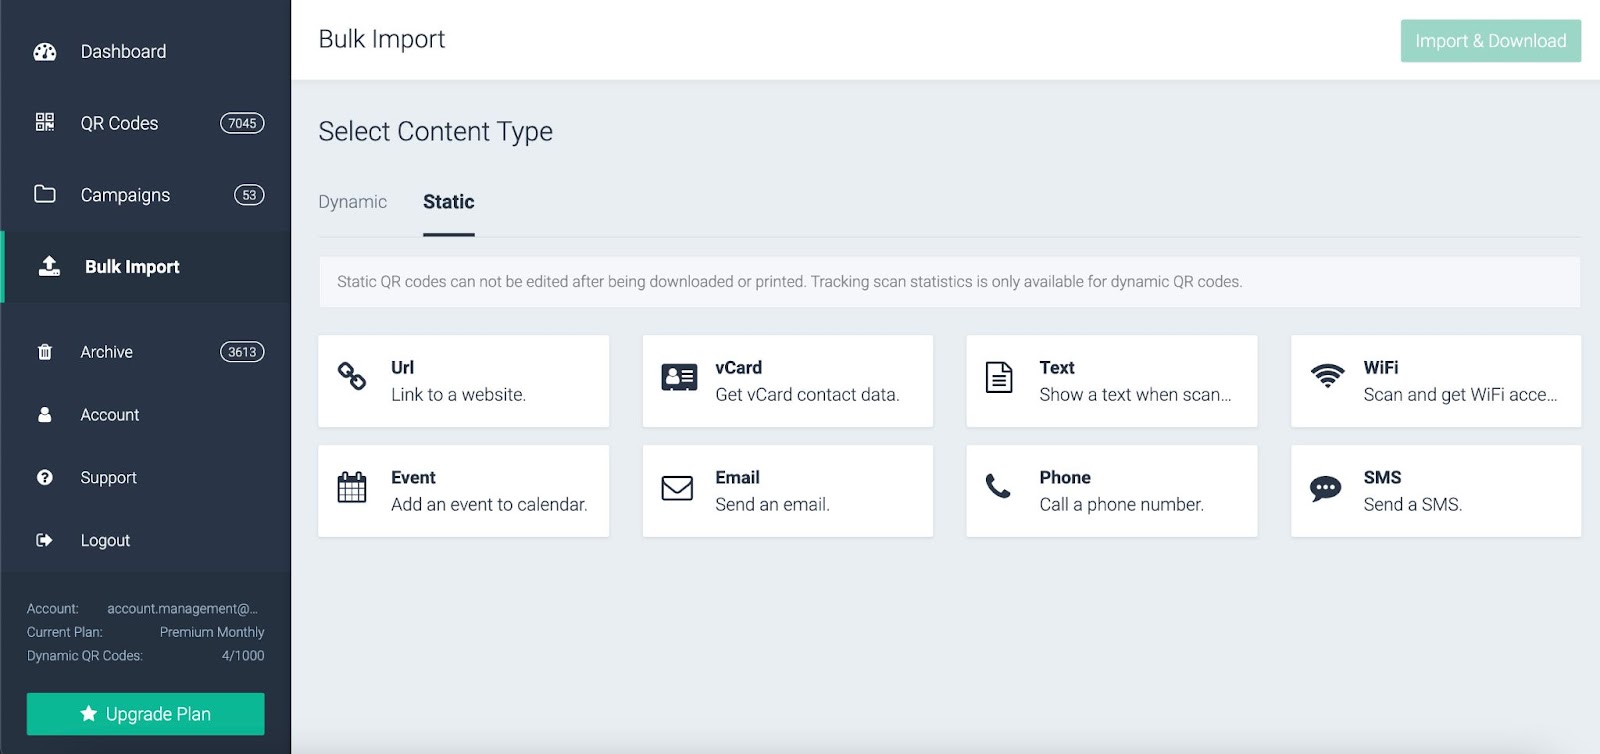
Once you are in the campaign you will be able to upload your CSV file that was created on the Blue Bite Dashboard. See V3 QR Code Documentation in Google Drive.
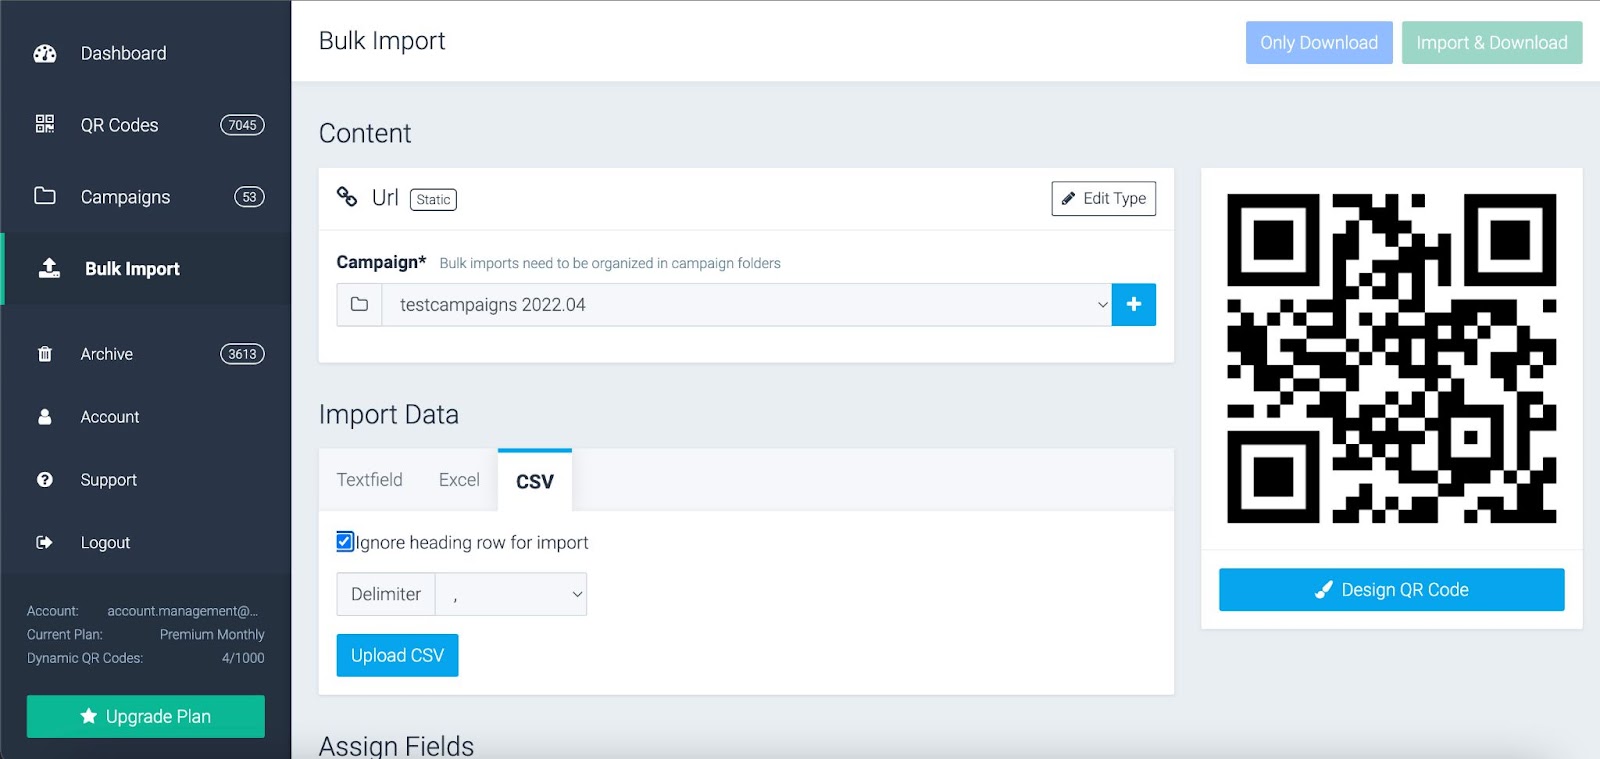
To begin, navigate to the ‘Bulk Import’ tab on your left hand side of the screen.
Step 5
Select the ‘Static’ tab on this screen followed by the ‘URL’ tab. You will begin to import your CSV files here, in the ‘Content’ section.
Step 6
In the ‘Content’ section of ‘Bulk Import’, you will upload the CSV files you created.
- Locate your campaign via the drop down under ‘Campaigns’
- Change the import data by clicking on the ‘CSV’ tab
- Click on the ‘ignore heading row for import’
- Leave the ‘Delimiter’ field as is. This will continue to separate the data with a comma.
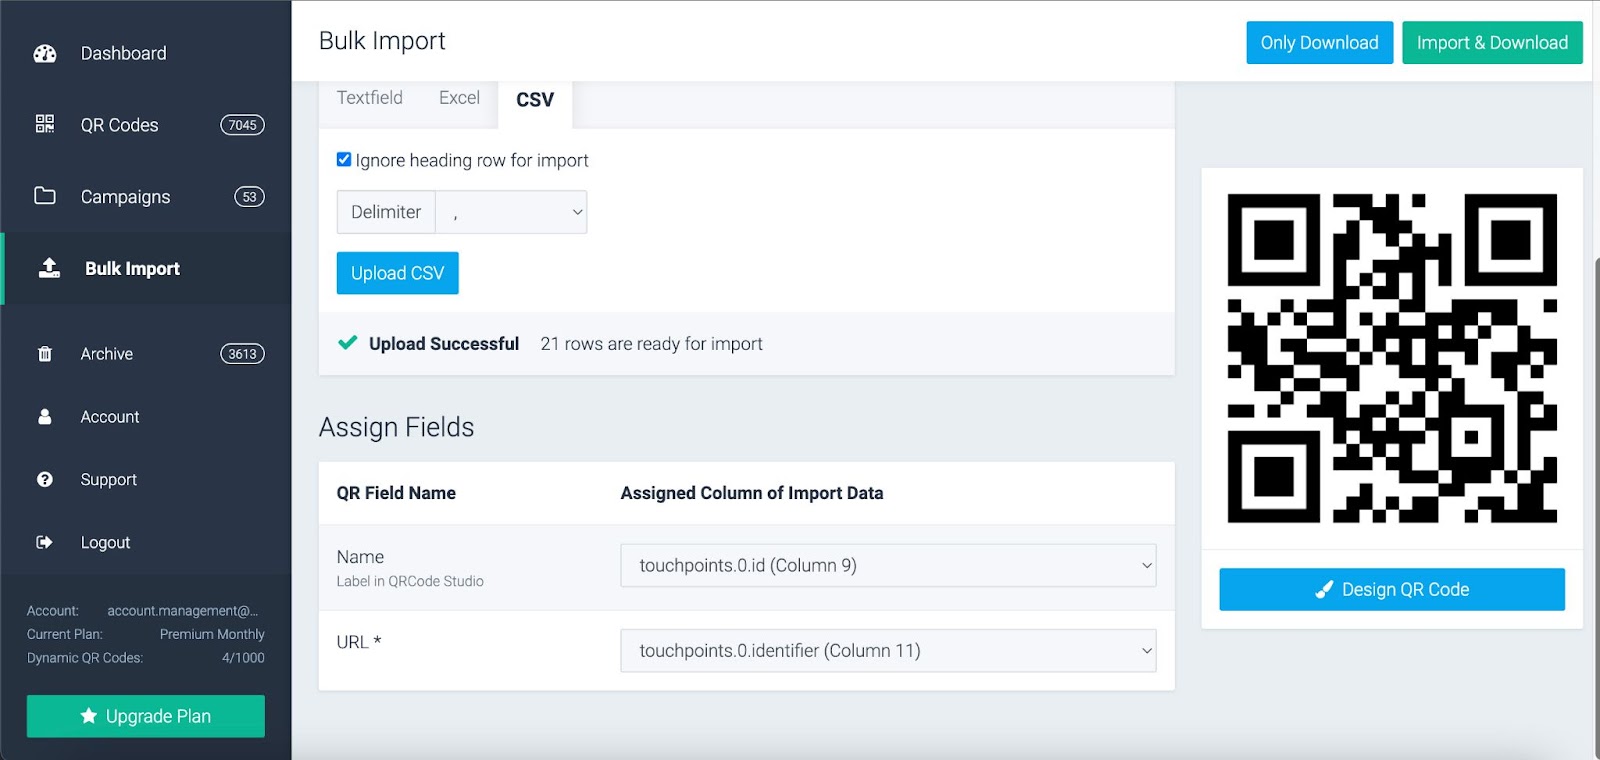
- Click the ‘Upload CSV’ button. Once you click the upload button QRCode Studio will automatically upload the CSV file from your computer folder. Once uploaded you will receive an Upload Successful message with the number of imported rows.
Step 7
Once you have uploaded your CSV file you will be required to ‘Assign Fields’
- For ‘Name’ - touchpoints.0.id
- For ‘URL’ - touchpoints.0.identifier
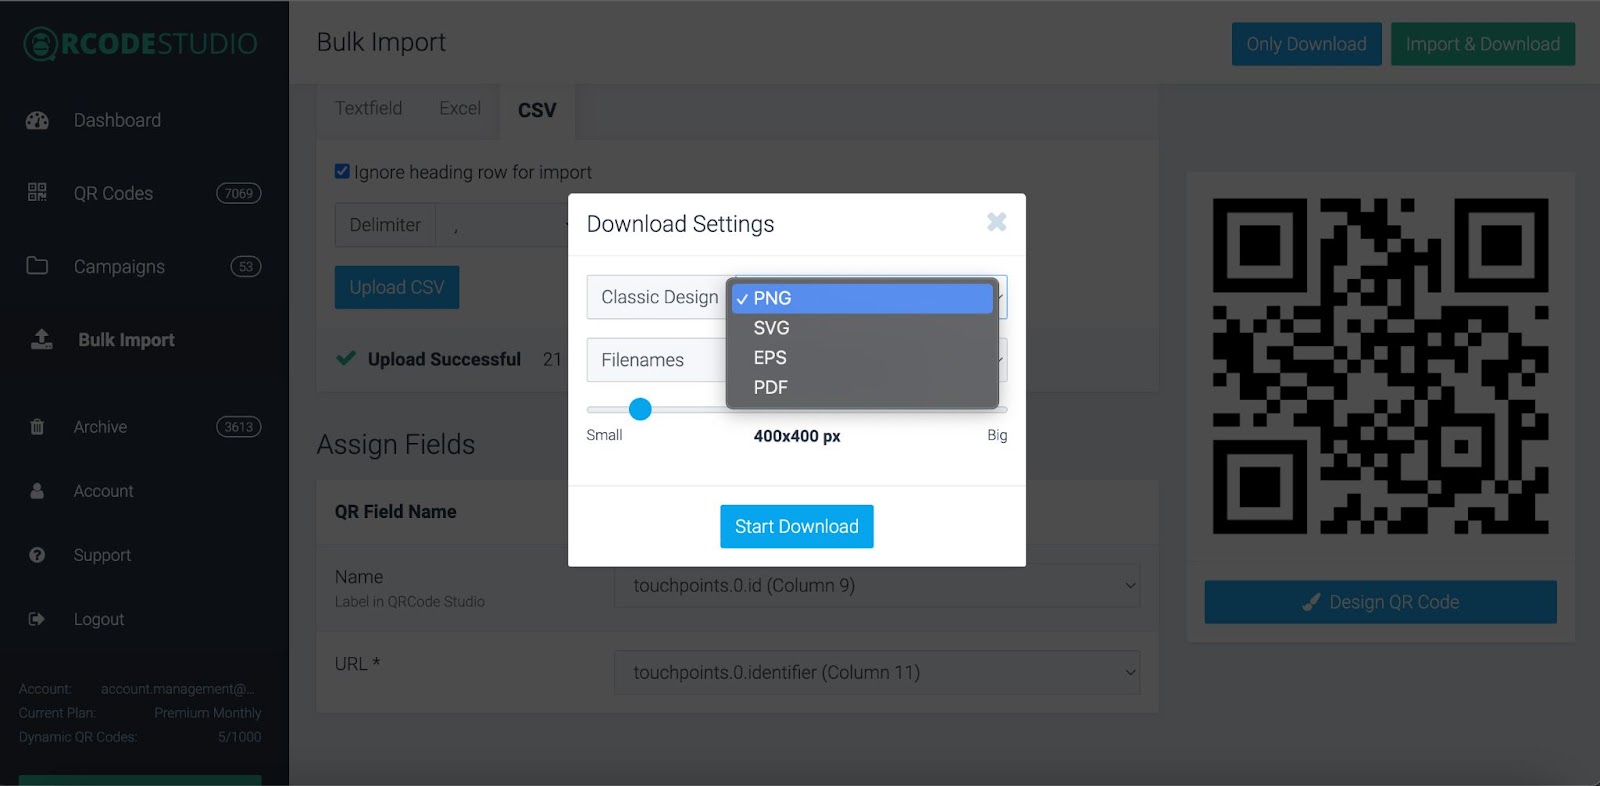
Step 8
Click on the ‘Import & Download’ on the upper right hand corner of the screen. You will be prompted to select Classic Design. You will need to download a PNG, SVG, EPS, and PDF file. Download them onto a project folder or desktop. Unzip each file but do not delete the zip file.
You can email the files to the client for them to view.
More
Tutorials


