This documentation is for our current platform, hosted at bluebite.com. If you are still using the mtag.io Object Manager or Studio to manage your Blue Bite account, please see our Legacy Documentation.
Previewing with the Experience Simulator
Blue Bite Experiences are highly-personalized landing pages that can include:
- dynamic content (e.g., object-specific text and images)
- exclusive content based on scan details (e.g., displaying certain information only for verified NFC scans)
- in-page logic (e.g., changes in page states and behaviors based on user interactions)
The Experience Simulator is a powerful, in-platform testing tool designed to streamline the process of creating Experiences.
With the Simulator, you can test dynamic content and in-page logic without leaving the Studio Editor, helping you build Experiences in less time. Studio Users can configure the time, device, location, and object that a site visitor is interacting with to better test how an Experience will appear to consumers under various conditions.
Using the Preview
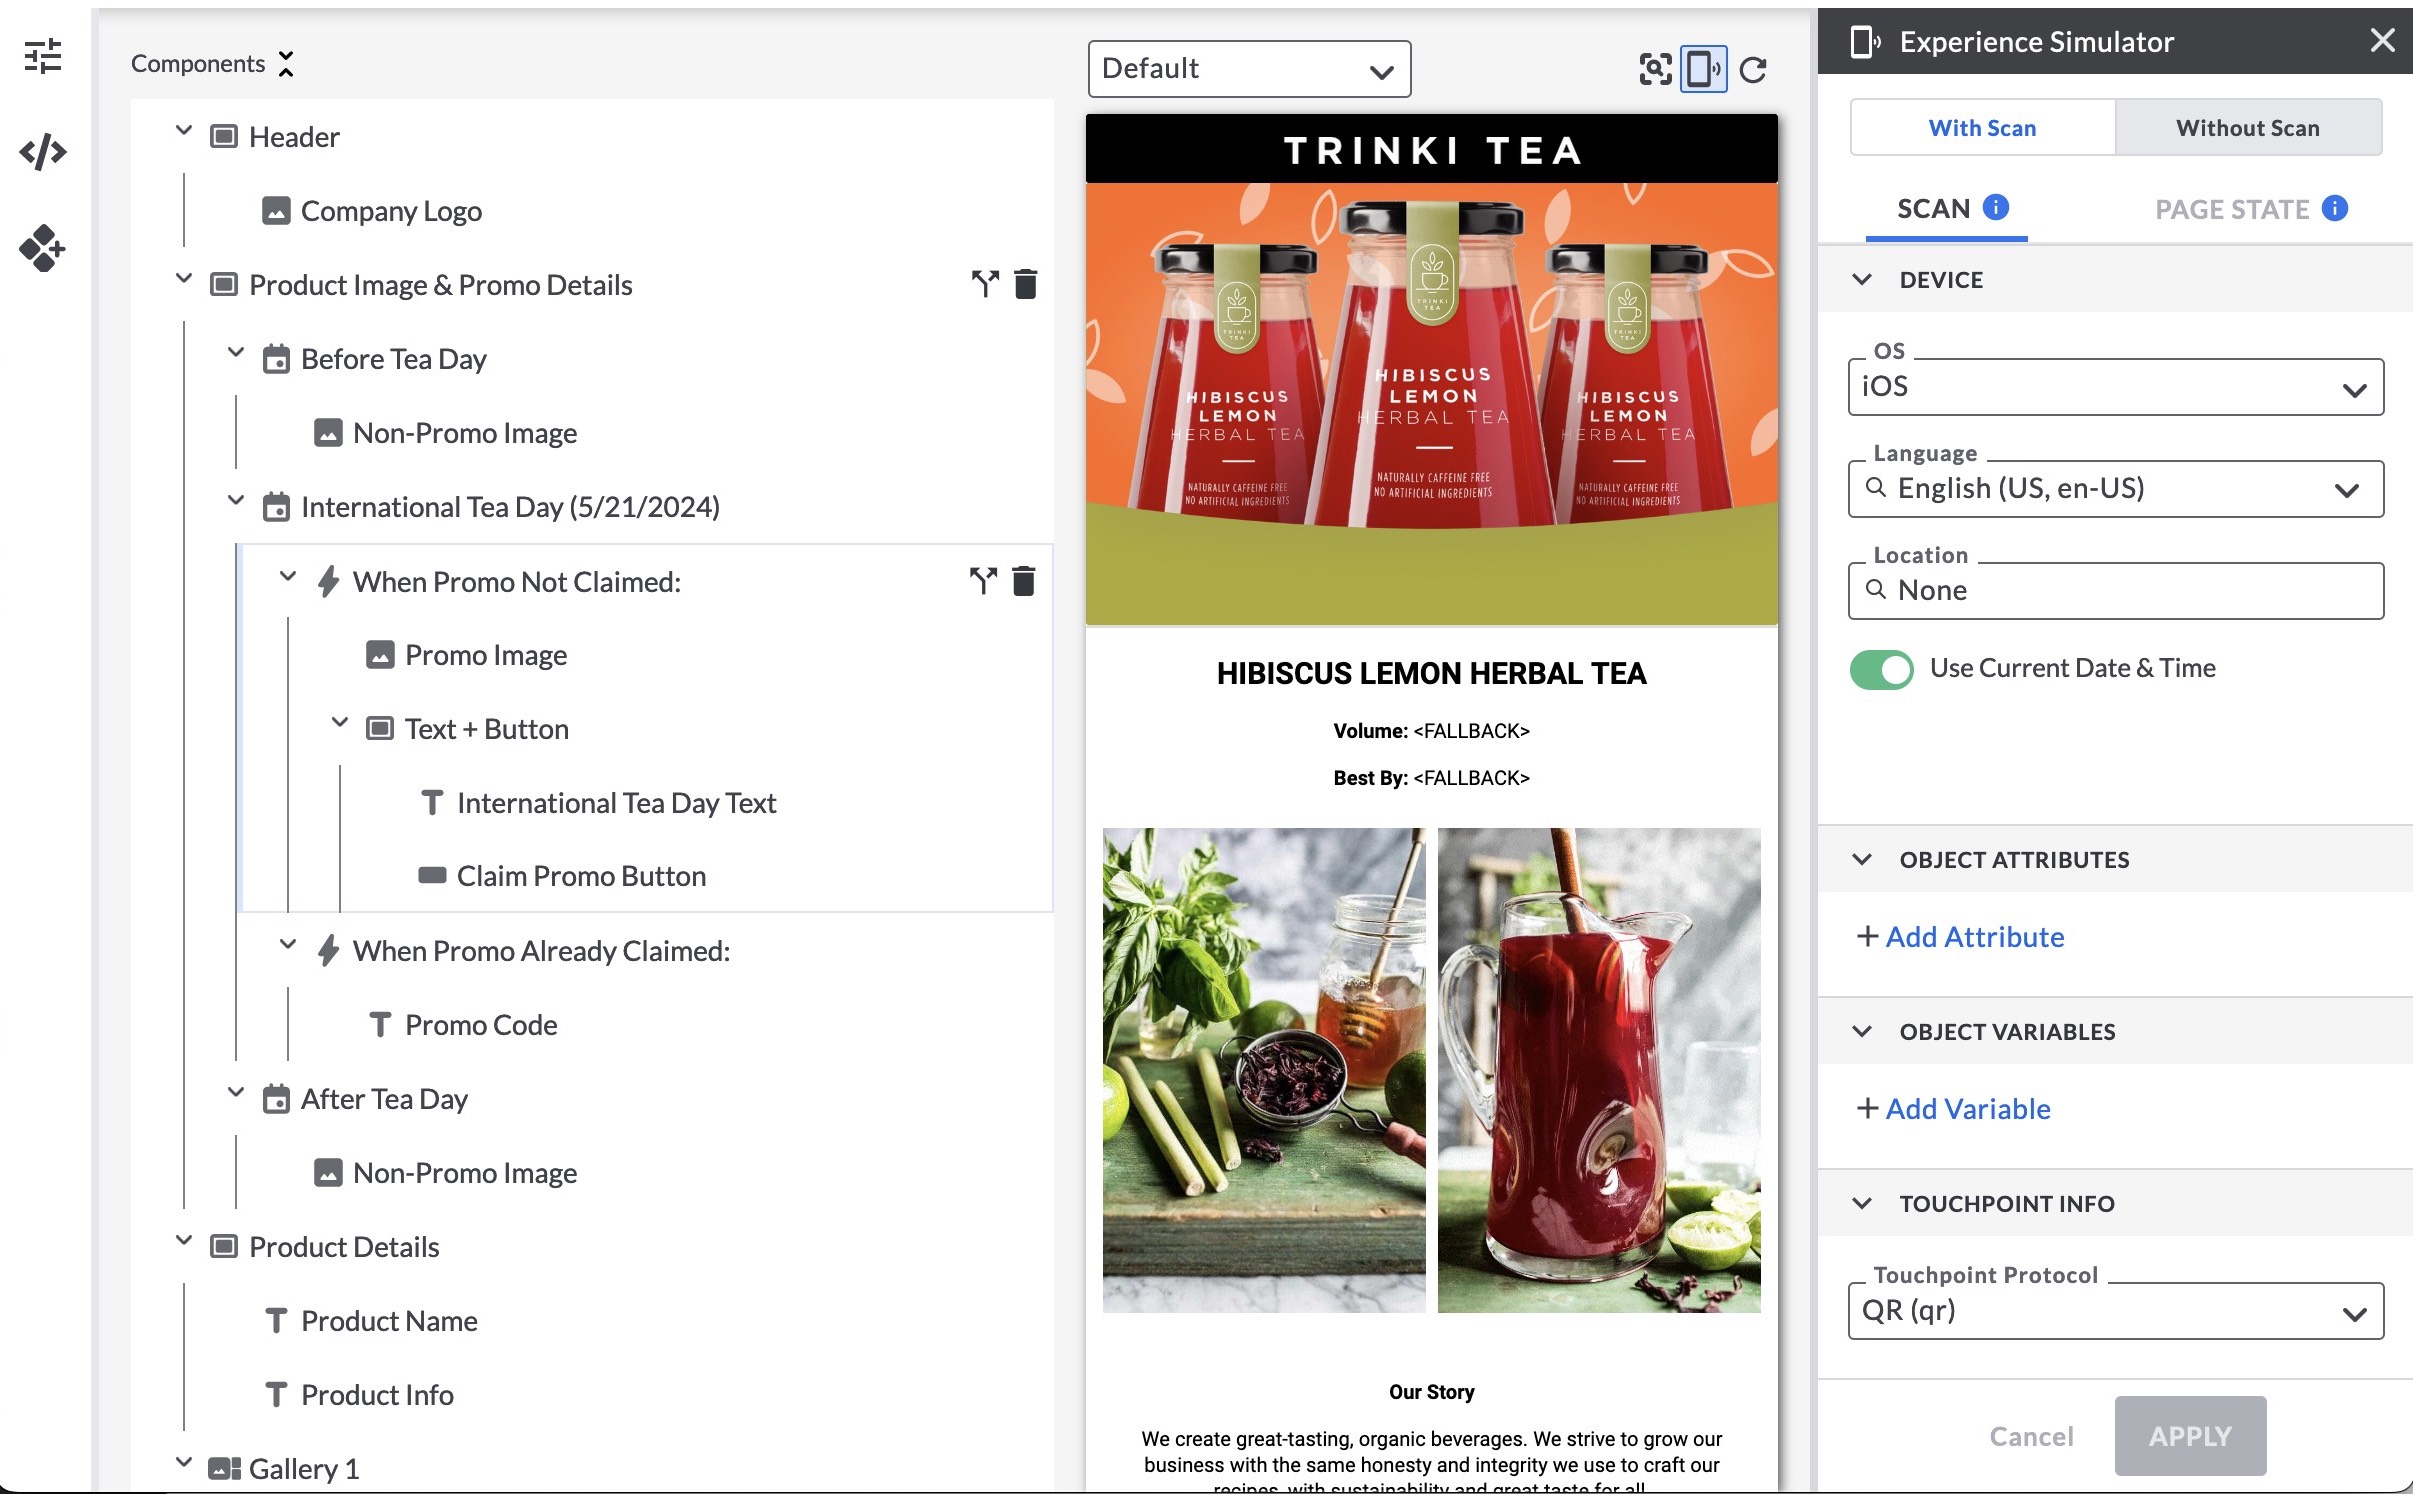
There are four primary elements of the Studio interface:
- The Component Tree (left), a drag-and-drop interface used to manage the components in your Experience
- The Preview (center), which updates live as you make changes to your Experience
- The Component Configuration Panel (not pictured; appears on the right-hand side of the interface when a component is selected), which shows all relevant styles and configuration options for the component selected in the Component Tree
- The Experience Simulator (right), which allows you to view current state details, as well as mock the time, device, location, and object information the preview is simulating
Each time you open an Experience in the Studio Editor, the preview will load to show the initial state of the page. As you make changes to your Experience (e.g., reorder components, update styles, etc), the preview will update in real-time, allowing you to see your modifications without refreshing the page.
Note: Changes to the Inside <head> and Before </body> custom code options require a full refresh of the preview. This is the only exception to the preview’s ability to update live.
Above the preview, you’ll notice several additional actions you can take.

Choose an Aspect Ratio: users can choose from a list of preset device types (e.g., iPhone 15 or Galaxy S23), or define a custom screen size to test the responsiveness of their Experience.
Inspect: Once you enter Inspect Mode, you can click on any item in the preview to focus that element in the component tree. This makes it easier to quickly locate components that need to be edited.
.gif)
Experience Simulator: Clicking this button will open the Experience Simulator panel. See below for additional functional details.
Refresh: If you want to return to the initial state of the preview, you can click refresh. Refreshing the preview will not save or revert changes made to your Experience configurations.
The Experience Simulator
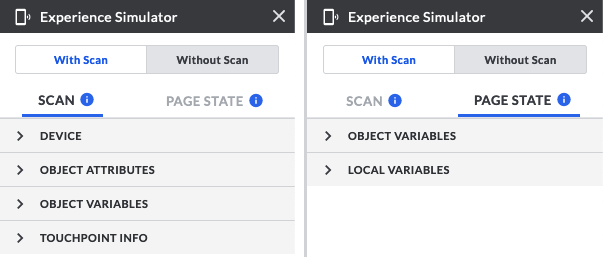
Clicking the phone icon above the Preview will open the Experience Simulator panel on the right-hand side of the interface. This panel has two tabs: Scan, where you can simulate a particular Device, Object, and Touchpoint the user is interacting with; and Page State, where you can view the current values of Local and Object Variables.
Simulate Device Details
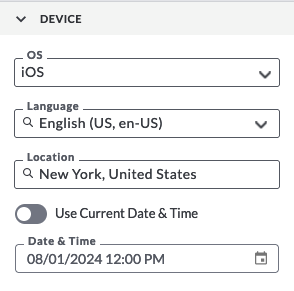
One major component of building an Experience is testing how your landing page functions for different devices and software settings. With the Simulator, you can test against the following device details:
- Operating System (OS): Test how an Experience will look when viewing on iOS vs. Android. Any logic built with the Device OS macros will update based on this setting.
- Language: If your Experiences include translated content, you can now test how your landing page renders in different languages. For a full list of supported languages, see here. Instances of the Device Language macros resolve to a value based on this setting.
- Location: If your Experience includes location-based contextualization, you can test its behavior by simulating browsing from different geographic locations. Users can choose from one of our suggested preset locations, search for an address, or enter a specific latitude and longitude. Once you click Apply, content built with the IP Location and Address macros will update to reflect your chosen location.
- Date & Time: Preview how your Experience will look at a specific date and time. Usages of the Page Load macros and Date macro functions will resolve based on the selected date and time.
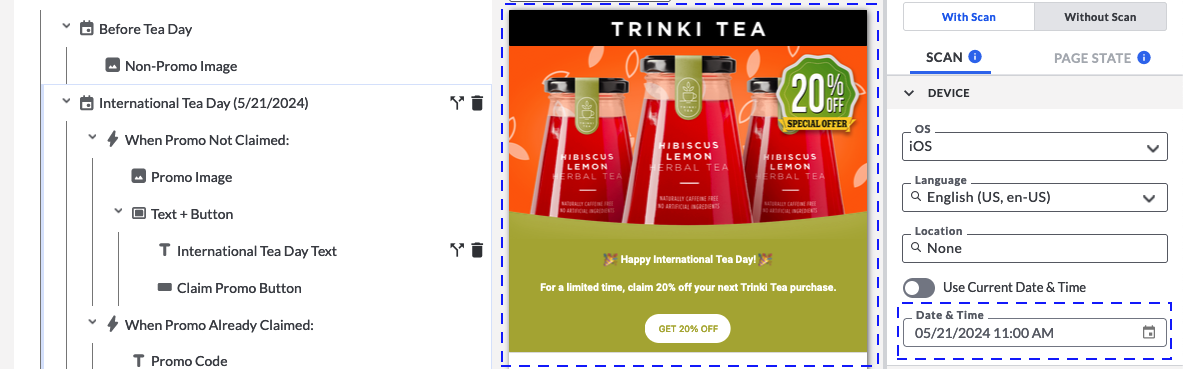
Example: Running a Promotion
Time-based promotions are a common way to use in-page logic in Blue Bite Experiences. In this example, a brand (Trinki Tea) has configured a digital Experience for their Lemon Herbal Tea. They are going to offer a 20% off coupon on International Tea Day (May 21st), and only want to show that coupon on that day. In order to do this, they embed the coupon within a schedule component that is active on May 21st.
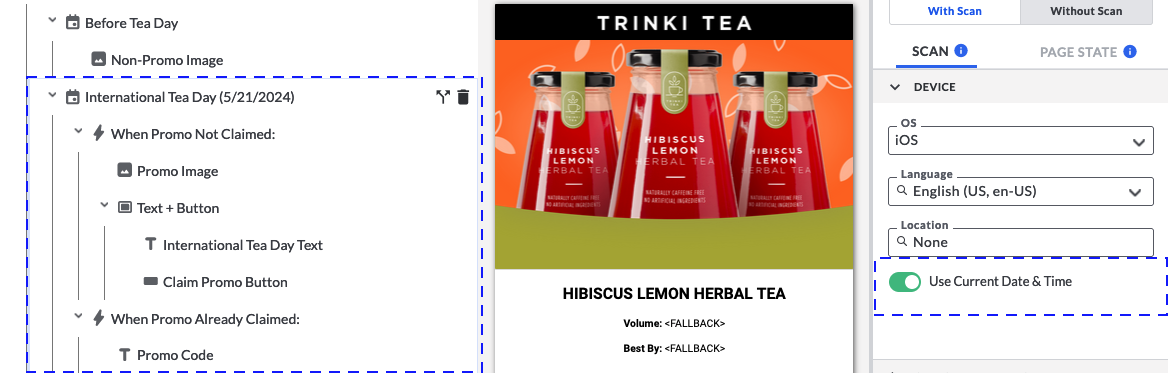

By default, when editing the experience, the Preview shows how the Experience will appear and behave at the platform user’s current date and time. This means that unless you are editing the experience on May 21st, you cannot test that the coupon looks and works as expected. However, with the Experience Simulator, the user can simulate that it is May 21st to test the promotion appears as desired.
Simulating Object & Touchpoint Details
Users can also test how an Experience’s content will change as a function of Object or Touchpoint details, such as:
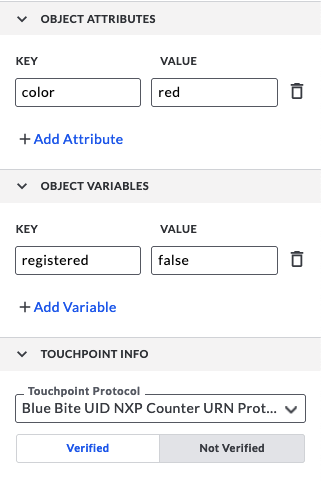
- Object Attributes & Variables: Enter object attributes (e.g., color = red) or variables (e.g., registered = false) to test against. Object macros in the Experience will resolve to the values specified in the simulator.
- Touchpoint Protocol: Use this setting to preview protocol-specific page logic. If your chosen protocol supports verification, you can test a verified and unverified scan; if your chosen protocol supports tamper, you can test what will occur if the touchpoint is scanned with tamper open or tamper closed.
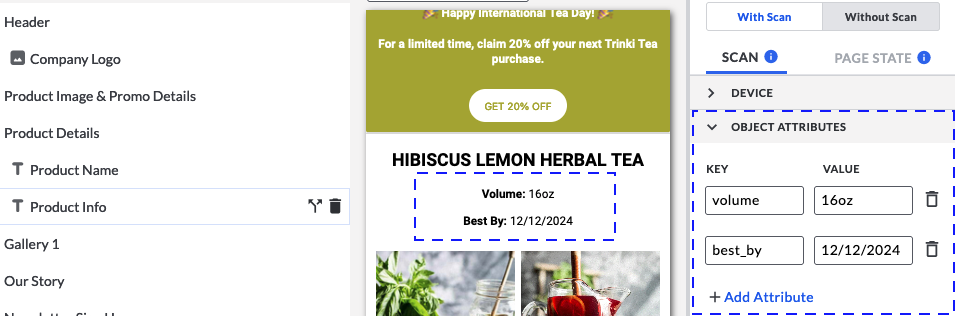
Example: Showing Product Details
Another common use of the Studio is including dynamic text content from Object Data.
In this example, Trinki Tea wants to include a section in their Herbal Tea Experience to display nutritional information about the product. This nutritional information is stored as Object Attributes, which are included in the Experience via the following Macros:

You can see that by default, the simulated Preview shows how the Experience will appear with no scan or object data – meaning, any Object Macros included in the Experience configurations will resolve to fallbacks.
However, with the Experience Simulator, the user can simulate object attributes like volume and expiration to test with realistic text content instead of a fallback.
Debugging Page State
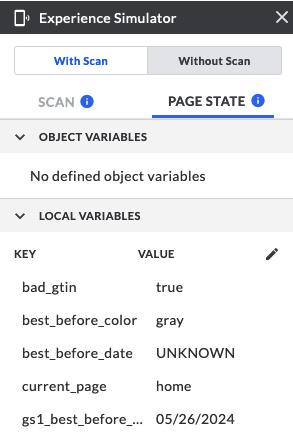
While interacting with the experience users, can view information about page state in the States tab. This tab displays Local and Object Variable values in real-time as users test within the Experience Preview. Troubleshoot state changes due to user clicks, local and object variable Actions, cookie banner acceptance and more. To learn more about using Local Variables to manage Page State, see here.
Previewing Shared Experiences
Though most Experiences are built to be accessed via a QR Code or NFC tag encoded with a Blue Bite Touchpoint URL, it’s always possible that end users share an Experience URL with someone who does not have access to the physical Touchpoint affixed to the product.
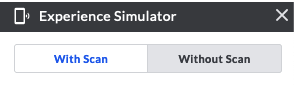
While scanning a physical Touchpoint (QR code or NFC tag) means all relevant scan data will be populated in the Experience, navigating to an Experience via direct link (e.g., by going to brand-name-123.bluebite.io/experience-id or my-custom-domain.com/experience-id) will result in an Experience populated with fallback information. Selecting "Without Scan" in the Experience Simulator enables Studio users to preview how an Experience will appear if it is shared. To learn more about fallbacks and when to employ them, see here.
